

You’ve locked down the venue, confirmed the speakers, and finalized the agenda. Now comes the part that determines whether anyone actually shows up: event advertising. It’s the difference between a packed room buzzing with energy and rows of empty chairs you’d rather not explain to stakeholders. Getting it right takes more than posting a flyer on social media and hoping for the best, it takes a real strategy with deliberate timing.
Most event organizers start promoting too late, spread their budget too thin, or lean on tactics that don’t match their audience. The result? Underwhelming turnout for an event that deserved better. What works is a layered approach, combining digital channels, physical presence, and high-visibility brand activations that stop people mid-scroll or mid-stride. That’s exactly where tools like custom inflatables, branded arches, and oversized product replicas come in. At TMP Inflatables, we’ve spent over 20 years helping marketing teams and agencies create the kind of visual impact that makes events impossible to ignore.
This guide breaks down proven event advertising strategies, walks through real examples worth stealing, and gives you a complete 30-day event advertising promotional plan you can adapt to your next event. Whether you’re organizing a product launch, trade show, or community festival, you’ll walk away with a clear, actionable roadmap to fill seats and maximize your event advertising reach.
What event advertising means in 2026
Event advertising in 2026 looks very different from what it did even three years ago. Audience attention is fragmented across more platforms, devices, and formats than ever before, and people have developed sharp filters for anything that feels generic or forced. Running a single Facebook campaign and calling it a day no longer cuts it. Today, effective event promotion requires showing up across multiple touchpoints, in both digital and physical spaces, with creative that earns attention rather than begging for it.
How the discovery journey has changed
The path someone takes from not knowing about your event to actually registering now involves four to seven distinct touchpoints on average before a decision gets made. They might scroll past a paid social ad during lunch, see a mention in an industry newsletter that evening, and then walk by a giant branded inflatable display at a partner venue on the weekend. Each encounter reinforces the last. No single channel owns the conversion, which means your event advertising strategy needs to stack exposures deliberately rather than betting everything on one placement.
The events that sell out consistently are rarely the ones with the biggest single ad buy. They’re the ones that show up everywhere their target audience already spends time, both online and in the physical world.
Short-form video on social platforms, geo-targeted paid search, out-of-home activations, email sequences, and physical brand installations all contribute to that layered exposure. Organic reach alone moves the needle only if you already have a massive and highly engaged following, and most brands and agencies do not have that luxury.
Physical activations still drive real results within event advertising
Digital channels handle reach and targeting efficiently, but physical brand presence delivers something digital simply cannot: a memorable, shareable, real-world moment. Custom inflatable arches, Giant Inflatables as product replicas, custom inflatable costumes, Giant Inflatable Characters and mascots as well as branded inflatable tents gives your event advertising promotion a tangible dimension that stops people mid-stride and creates genuine curiosity.
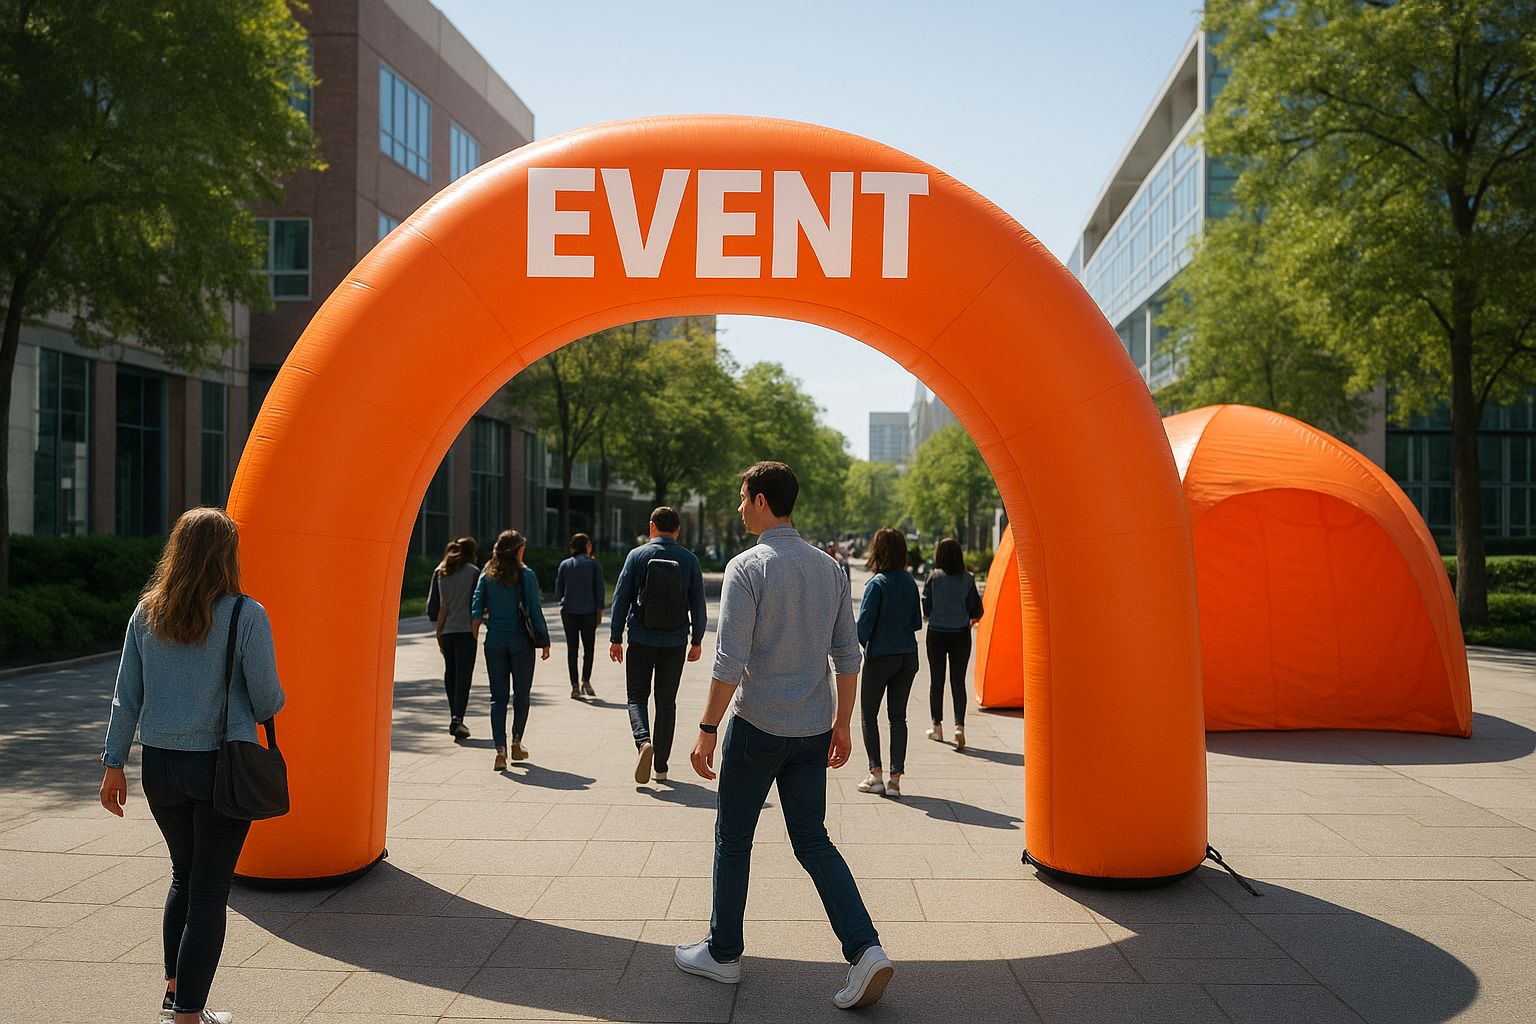
Beyond the direct impression, physical activations generate organic social content from attendees and passersby who photograph and share what they see. That earned media extends your campaign reach at no additional cost and carries more credibility than a paid placement because it comes from real people in a real environment. For experiential marketing teams, this multiplier effect is one of the clearest arguments for building physical assets into the event advertising budget from the start rather than treating them as an afterthought.
What integrated actually looks like in practice for event advertising
Integrated event advertising means your creative and messaging stay consistent across every channel your audience encounters, from a retargeted display ad to a physical installation outside a retail partner location. When someone sees your event on Instagram and then physically walks under a branded arch on their way to work, both experiences should feel like they belong to the same campaign. That consistency accelerates recognition and shortens the time it takes to move someone from awareness to registration.
A concrete example: a B2B conference campaign might run LinkedIn sponsored content targeting marketing directors by industry vertical, paired with a custom inflatable display at a co-located trade show, and a dedicated landing page that mirrors the visual identity of both. Every element uses the same headline, color palette, and call to action. That coherence is what makes the whole campaign feel authoritative and easy to trust, which is exactly what converts attention into ticket sales.
Define your goal, audience, and hook
Before you spend a dollar on event advertising, you need three things locked down: a clear goal, a specific audience profile, and a hook that makes your event worth their time. Without these, even a generous budget produces disappointing results because you’re pushing the wrong message to the wrong people at the wrong moment. Get these three elements right, and everything else, channel selection, ad copy, and creative assets, follows naturally from them.
Set a single measurable goal for event advertising
Vague goals produce vague results. Your event advertising goal should be a single, specific number tied to a deadline: 500 registrations by day 21, 200 paid ticket sales in the first two weeks, or 1,000 RSVPs before the early-bird window closes. One goal keeps your campaign focused. When you try to optimize for awareness, ticket sales, and press coverage simultaneously, you dilute every decision from budget allocation to creative direction.
Pick one primary metric, track it daily, and let every other decision in your campaign serve that number.
Use this simple goal-setting template before you build anything:
| Element | Your Answer |
|---|---|
| Primary metric | (e.g., paid registrations) |
| Target number | (e.g., 750) |
| Deadline | (e.g., 14 days before the event) |
| Secondary metric | (e.g., email list signups) |
Know exactly who you’re targeting
Your audience definition determines your channel mix, your ad creative, and the language you use in every piece of copy. “Marketing professionals” is too broad. “Marketing directors at mid-size B2B software companies who manage event budgets over $50,000” gives you something actionable. The more specific you get, the easier it becomes to write copy that feels like it was written directly for them, because it was.
Build a one-paragraph audience profile before you write a single ad. Include job title, industry, primary pain point, and the specific reason they would attend your event rather than spend that afternoon doing something else. Your event has to compete with packed calendars, travel hesitation, and every other priority your audience is already juggling.
Craft a hook that makes people stop
Your hook is the single sentence that answers “why should I care about this event?” in terms of what the attendee gains, not what you’re offering. Swap “Join us for our annual marketing summit” for “Walk away with a tested 90-day campaign framework you can use the following Monday.” The first describes your event; the second sells the outcome, and outcomes are what convert attention into registrations.
Build the event advertising page that converts
Your event advertising campaigns can generate strong click-through rates and still fail to produce registrations if the page people land on does not do its job. Every paid ad, social post, and physical activation you run drives traffic to a single destination, and that destination needs to convert visitors into confirmed attendees before they close the tab. Think of your event page as your 24-hour sales rep. It needs to answer three questions instantly: What is this event, why should I attend, and what do I do right now?
Lead with the outcome, not the logistics
Most event pages open with the event name, date, and location. That’s fine as supporting detail, but it should not be the first thing your visitor processes. Lead with the outcome the attendee walks away with, written in one or two sharp sentences. “Learn how to cut your paid acquisition cost by 30% in a single afternoon workshop” works harder than “Join us for our Q3 Marketing Workshop.”
Your headline is not about your event. It’s about what your attendee gains from spending their time there.
Place the date, location, and registration button within the first visible screen without requiring any scrolling. Every extra click or scroll you add between arrival and registration is a point where you lose people.
Elements every high-converting event advertising page needs
Your page needs to carry the full weight of the buying decision for anyone who arrives without prior context. Use this checklist to audit your page before launch:
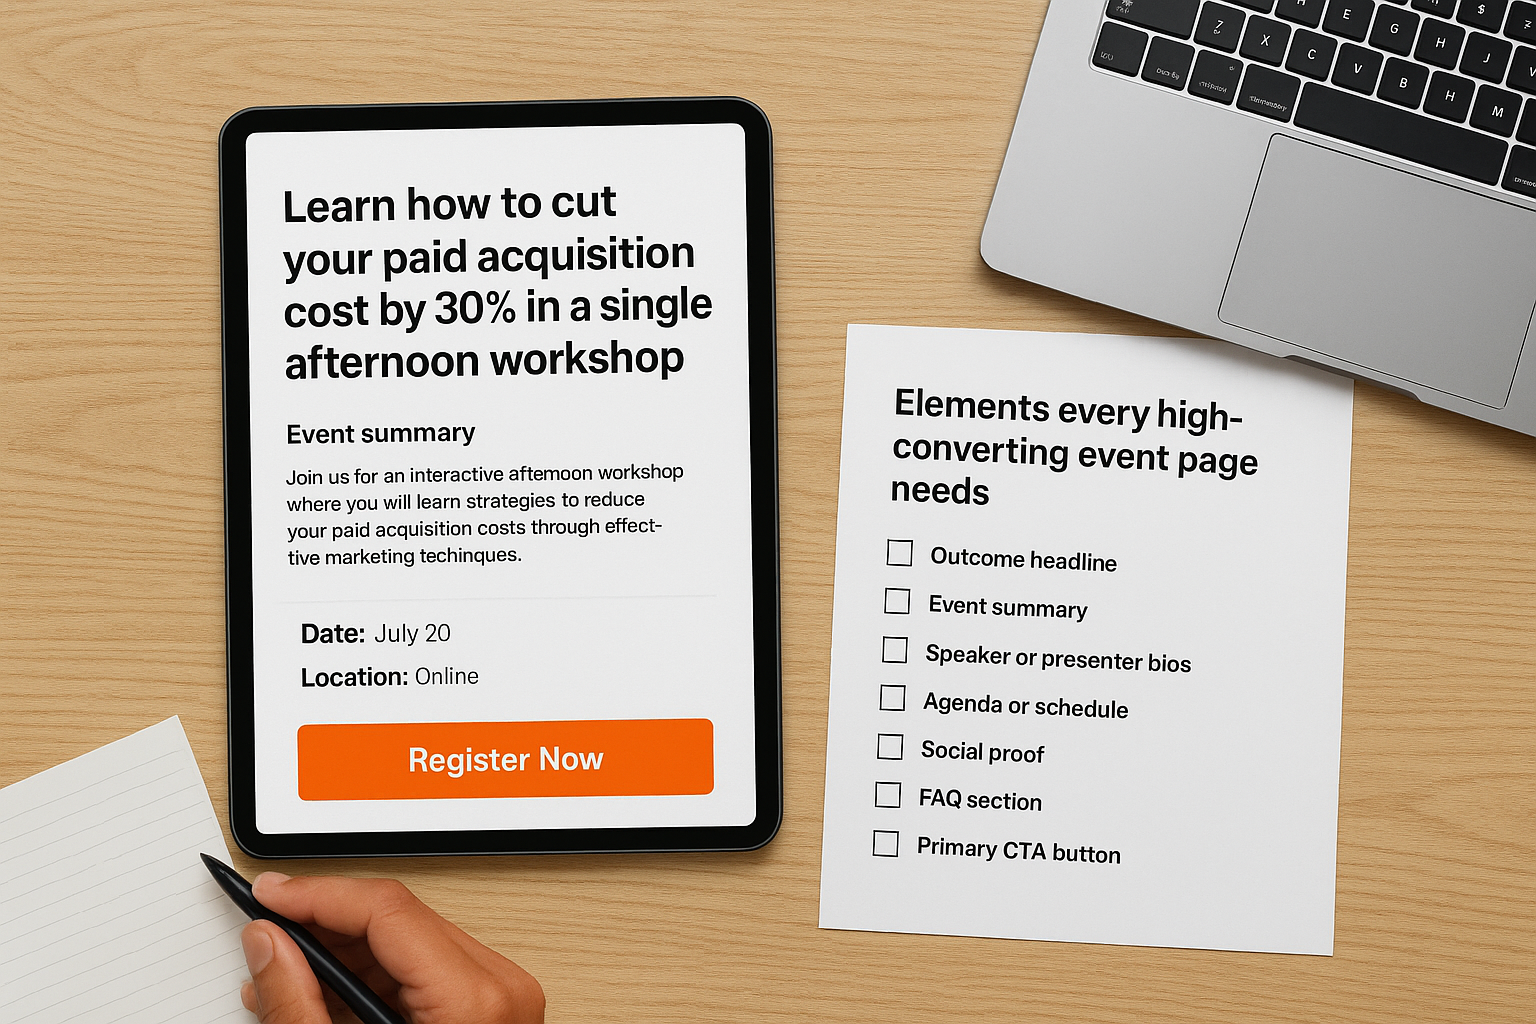
| Element | What it should do |
|---|---|
| Outcome headline | Sell the attendee benefit in one sentence |
| Event summary | Cover who it’s for and what happens in 3-4 sentences |
| Speaker or presenter bios | Build credibility with names and credentials |
| Agenda or schedule | Show exactly what attendees will experience |
| Social proof | Testimonials, past attendance numbers, or brand logos |
| FAQ section | Remove objections around cost, format, and logistics |
| Primary CTA button | One action only, repeated at least twice on the page |
Keep the registration form short
Friction kills conversions, and nothing creates friction faster than a long registration form. Ask only for what you genuinely need to send confirmations and reminders: first name, last name, email address, and company name for B2B events. Every additional field you add reduces completions. If you need more information for post-event follow-up, collect it after registration through a confirmation email sequence rather than at the point of sign-up.
Pick the right channels and placements
Choosing channels based on what feels familiar rather than where your audience actually spends time is one of the most common and costly mistakes in event advertising. Your channel selection should follow directly from the audience profile you built in the previous step. If your target attendee is a marketing director at a mid-size company, LinkedIn sponsored content will outperform a TikTok campaign every single time, regardless of TikTok’s overall reach numbers.
Match channels to your audience’s behavior
Different audience segments live on different platforms, and the fastest way to waste your budget is to assume one channel covers everyone. Use the table below as a starting framework to match your event type and audience to the right primary and secondary channels:
| Event type | Primary channel | Secondary channel |
|---|---|---|
| B2B conference | LinkedIn Ads | Email to industry list |
| Consumer product launch | Instagram / Meta Ads | Out-of-home activations |
| Trade show | Google Search Ads | LinkedIn retargeting |
| Community or outdoor festival | Facebook Events | Local digital display |
| Corporate brand activation | Physical installations | Paid social retargeting |
The channel you find easiest to use is rarely the channel your audience finds most useful.
Your email list deserves special attention regardless of event type. People who have already opted into your communications are your warmest audience. Send a dedicated event announcement email, followed by a reminder sequence at the two-week mark and again three days before the event closes early-bird pricing.
Layer paid search into your event advertising channel mix
Google Search ads capture demand that already exists. When someone types “marketing conference Chicago 2026” into Google, they are actively looking for what you are selling. Bidding on high-intent event search terms places your registration page directly in front of people who are already in decision mode. Combine search campaigns with retargeting to recapture visitors who clicked through but did not register on the first visit.
Add physical placements to your event advertising plan
Physical channel placements give your campaign a presence that digital alone cannot replicate. Custom inflatable arches and oversized branded displays positioned near venues, partner locations, or high-foot-traffic retail areas put your event in front of people who have never seen your digital ads and generate shareable moments that extend your organic reach. Plan these installations as dedicated line items in your channel budget, not as optional extras you add if money is left over.
Write ads and create visuals people notice
Strong ad copy and creative assets are the engine of your event advertising campaign. They determine whether someone stops scrolling or keeps moving, whether your registration page gets traffic or sits idle. Most event ads fail not because of bad targeting but because the creative is generic: stock photos, vague benefit statements, and headlines that could apply to any event in any industry. Writing and designing ads that earn attention requires a disciplined approach, starting with the copy and building outward to the visual layer.
Write copy that focuses on one benefit
Your ad headline has roughly two seconds to earn the next two seconds of attention. Use that space to state one specific, concrete benefit your attendee gains, not a description of the event itself. “Cut your customer acquisition cost in half” works harder than “Join 500 marketing professionals in Chicago.” The first tells your reader exactly what they gain; the second tells them almost nothing useful.
One clear benefit stated plainly will always outperform a list of vague selling points buried in a paragraph.
Keep your body copy under 50 words for most digital placements. State the benefit, add one line of credibility such as a speaker name, company logos, or past attendance number, and end with a direct call to action that matches the button on your landing page word for word. Use this copy template for paid social placements:
| Element | Example |
|---|---|
| Headline | “Build a 90-day campaign framework in one afternoon” |
| Body | “Join [Name], VP at [Company], and 400 marketing leaders on June 14 in Austin. Seats are limited.” |
| CTA | “Reserve your seat” |
Design visuals that stop the scroll
High-contrast visuals with minimal text consistently outperform busy, cluttered creative in paid social environments. Use one dominant image or short video clip, one headline overlaid in a legible font, and your brand colors applied consistently across every ad variant. Avoid stock photos of people in conference rooms; real event photography or bold product visuals perform significantly better because they feel specific rather than generic.
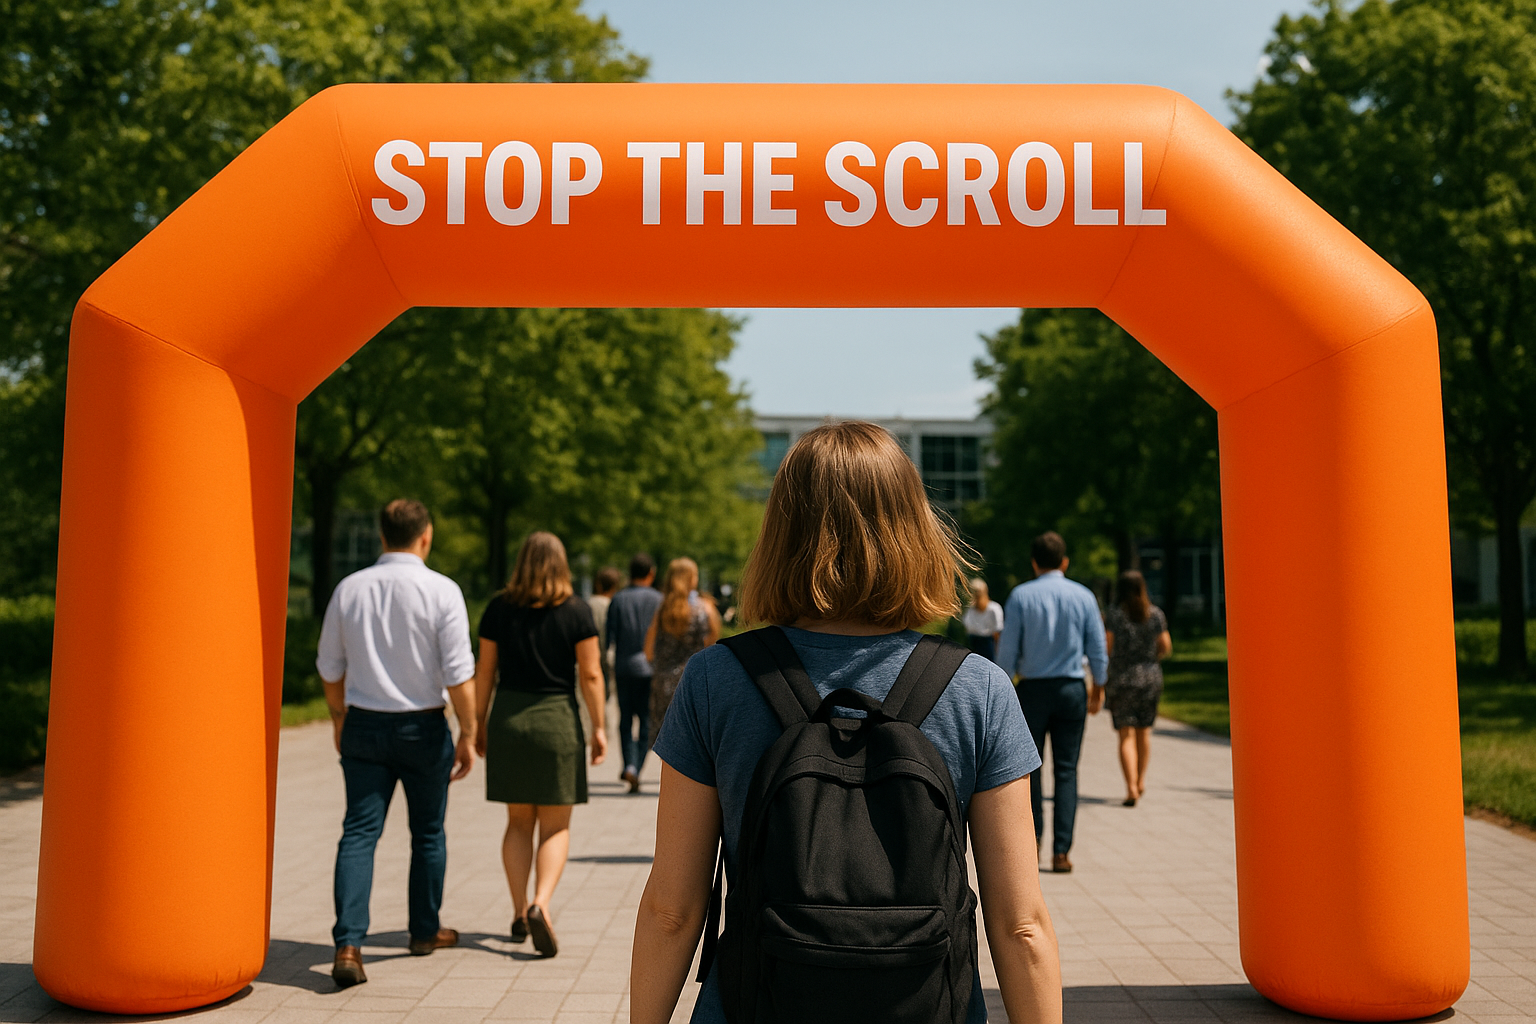
For physical activations like inflatable displays and branded arches, apply the same discipline: one clear brand mark, one short message, and high-contrast color combinations that read from a distance. Passersby have even less time to process your message than someone scrolling a feed, so every visual element needs to earn its place on the structure.
Set budget, timing, and measurement
Your event advertising budget and timeline are not separate decisions you make independently. They are directly connected, and getting the relationship between them wrong is one of the fastest ways to burn spend without seeing results. Most campaigns front-load creative production costs and leave too little for actual media spend, or they launch too close to the event date and never build enough momentum to drive registrations at scale. Planning both together, with clear measurement benchmarks at each phase, solves both problems before they start.
Allocate your budget across three phases
Split your total budget across three distinct campaign phases rather than spending evenly across the full promotional window. This structure concentrates your heaviest spend during the periods when audience intent is highest and prevents you from running dry in the final push when urgency drives the most conversions.
| Phase | Timing | Budget share | Focus |
|---|---|---|---|
| Awareness | 30 to 21 days out | 25% | Broad reach, video, physical activations |
| Consideration | 20 to 8 days out | 45% | Retargeting, email sequences, paid search |
| Conversion | 7 days to event day | 30% | Urgency-driven CTAs, last-chance offers |
Time your campaign to match the buying window
Promotional timing should align with how your audience makes decisions, not with when your team feels ready to launch. B2B event registrations cluster heavily in two windows: the first 72 hours after the campaign launches (early adopters) and the final five days before the deadline (deadline-driven buyers). Plan your messaging and spend to capitalize on both windows rather than applying flat pressure across the entire campaign period.
The biggest registration spikes almost always come from urgency, either early-bird pricing or a hard deadline, not from creative quality alone.
Measure what actually matters
Track three metrics from day one: cost per registration (total spend divided by confirmed registrations), registration page conversion rate (visitors divided by registrations), and channel attribution (which source produced each registration). These three numbers tell you whether your budget is working, whether your landing page is converting, and which channels deserve more investment.
Review your event advertising channel attribution data weekly rather than at the end of the campaign. If LinkedIn is producing registrations at half the cost of display ads, reallocate budget mid-campaign rather than waiting for a post-event report. Real-time budget shifts based on live performance data consistently produce better final results than a fixed spend plan that you never adjust.
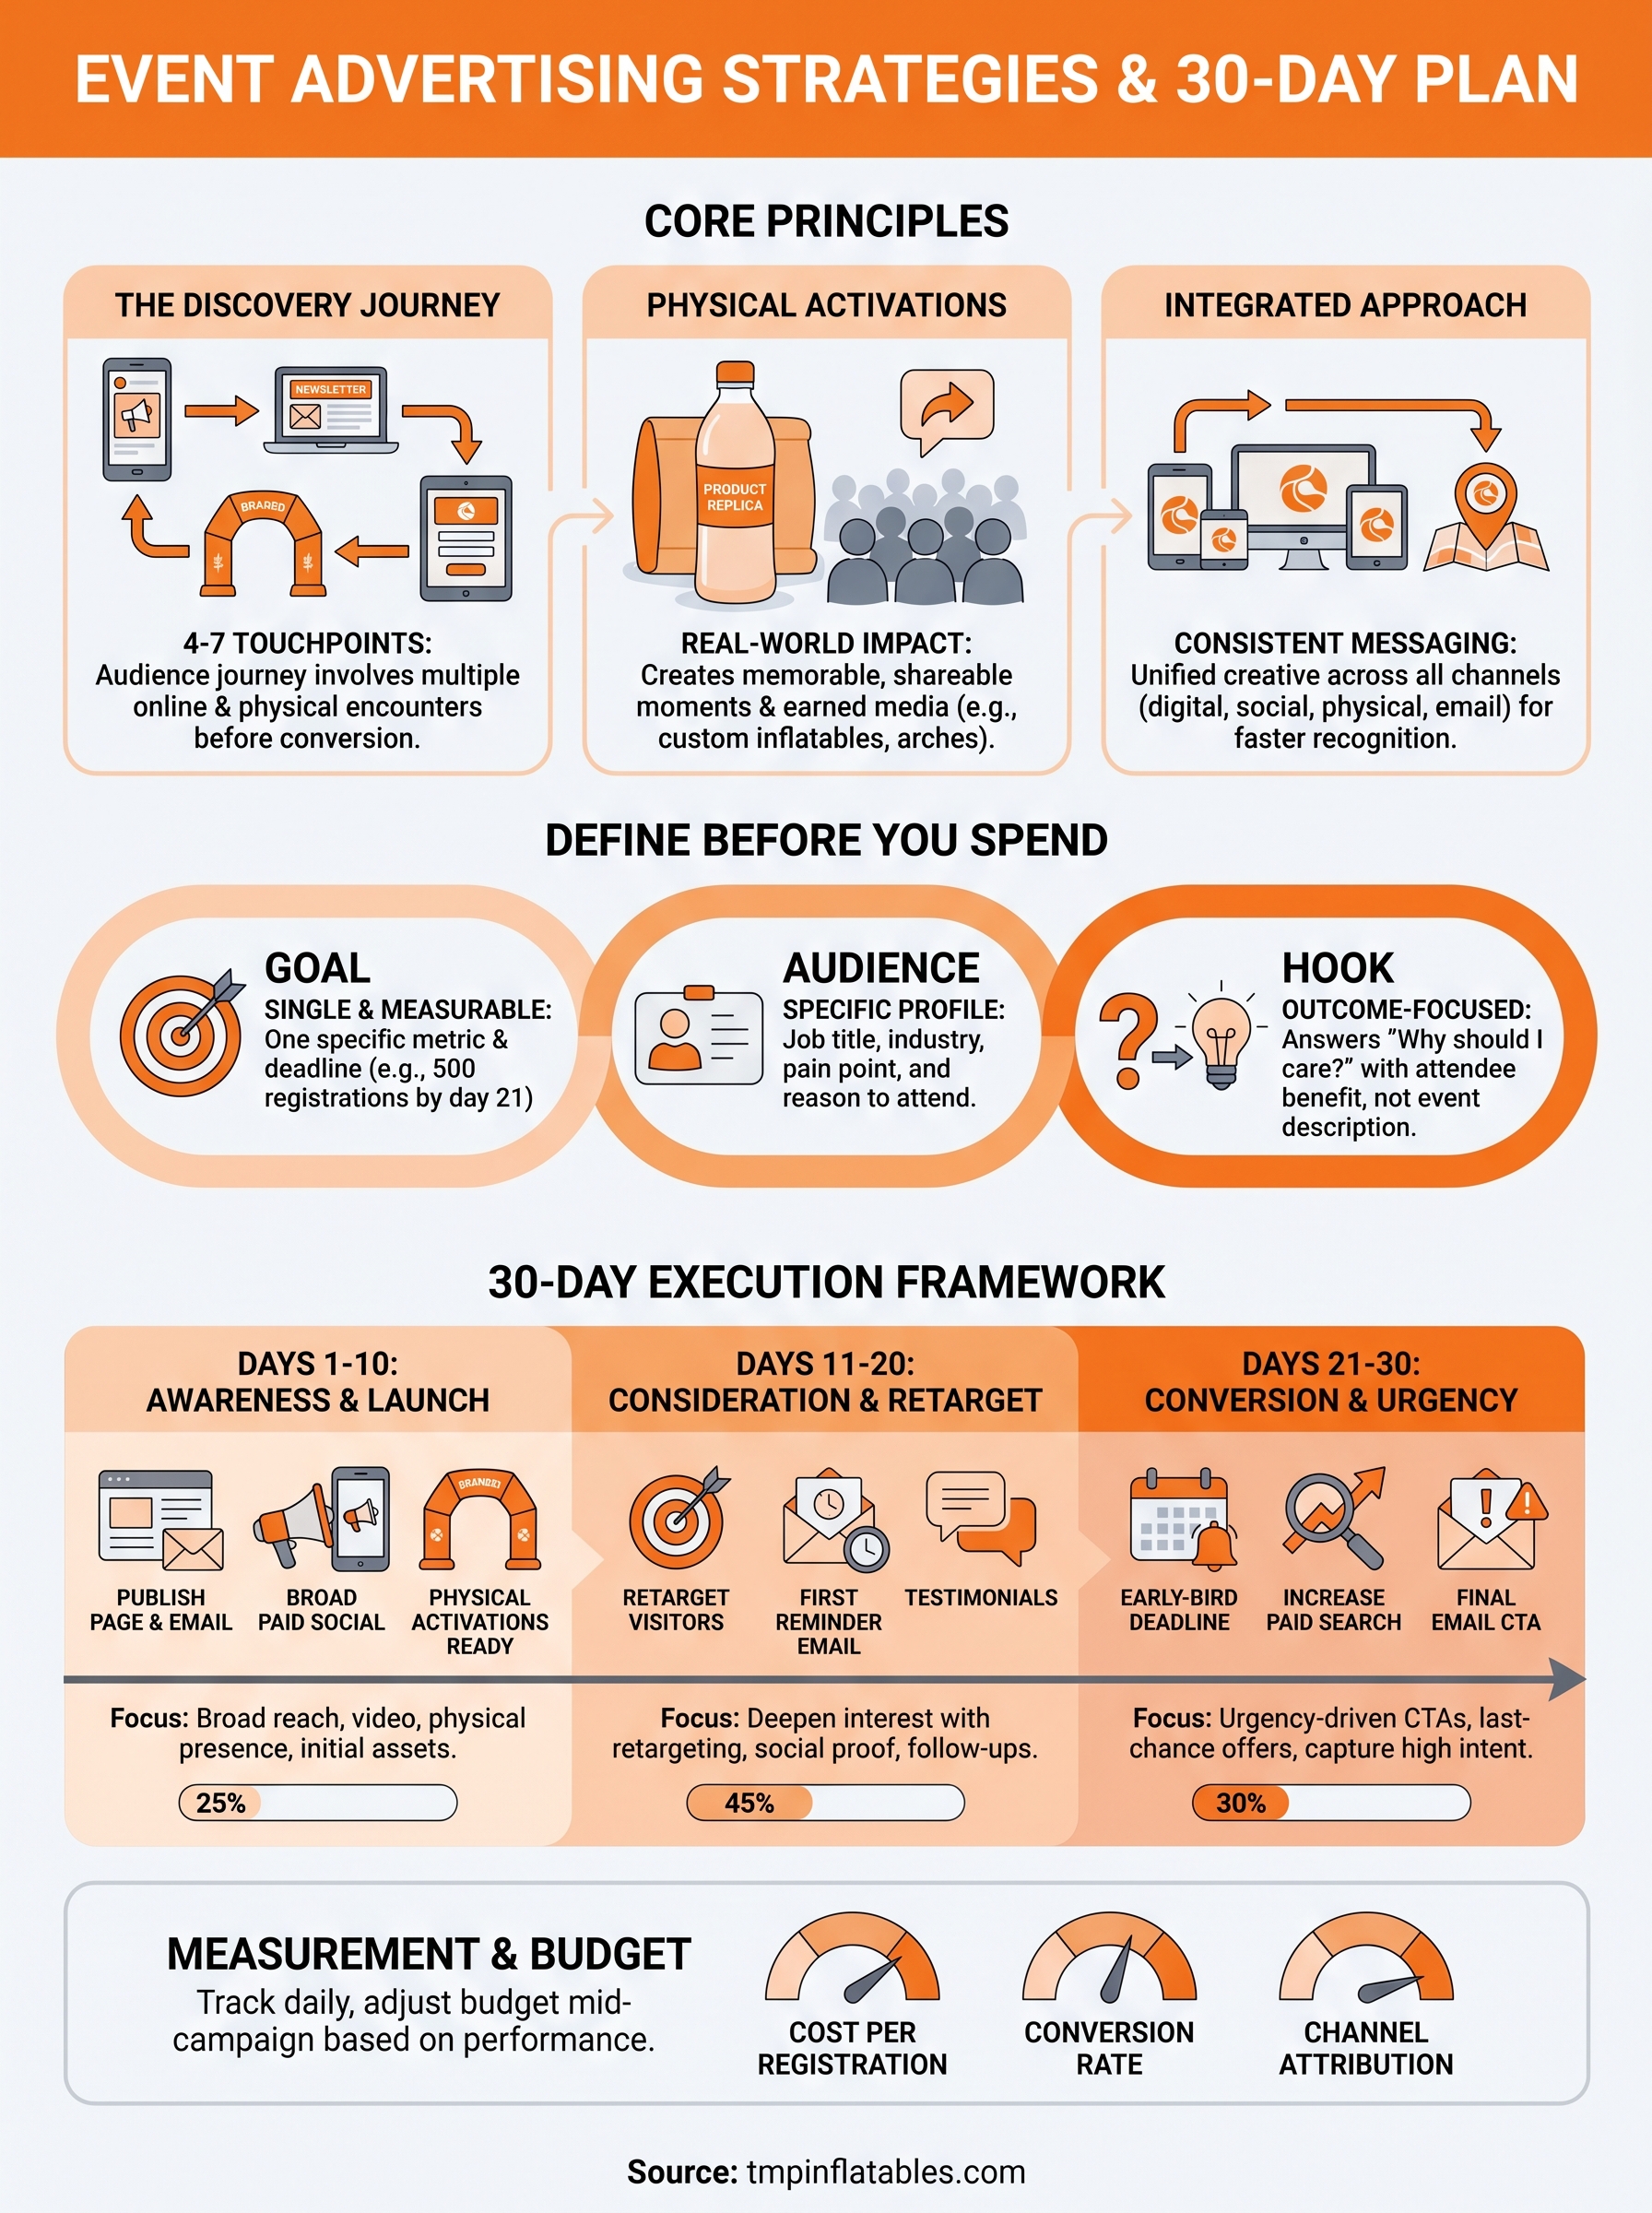
Run a 30-day event advertising plan
The sections above give you the strategy. This section gives you the day-by-day execution framework to put it all into motion. Use this 30-day plan as a working template, not a rigid script. Adjust the specific tactics to fit your event type and budget, but keep the three-phase structure intact: awareness first, consideration second, conversion last.
Days 1 to 10: Launch and build awareness
Your first priority is getting your event in front of the right people before any competitor event captures their attention and calendar space. Publish your event landing page on day one and share it across every owned channel immediately: email list, social profiles, and partner networks. Launch your broad-reach paid social campaigns on day two, targeting your defined audience profile with video or image ads focused on the single outcome benefit you identified earlier.
Also on day one, confirm delivery of any physical activations, such as custom inflatable arches or branded display structures, so they are ready for placement by day seven. Physical assets placed at partner venues or high-traffic locations during this phase generate awareness that runs in parallel with your digital spend at no additional media cost.
| Day | Action |
|---|---|
| 1 | Publish event page, send launch email, order physical assets |
| 2 | Launch paid social awareness campaign |
| 5 | Publish organic social content featuring speaker or agenda highlights |
| 7 | Install physical brand activations at confirmed locations |
| 10 | Review click-through rates and adjust creative variants underperforming by 20% or more |
Days 11 to 20: Retarget and deepen consideration
Switch your primary budget focus to retargeting anyone who visited your event page but did not register. Set up retargeting audiences in Meta Ads Manager and LinkedIn Campaign Manager using your event page URL as the trigger. Send your first reminder email to your list on day 12, featuring a testimonial from a past attendee or a confirmed speaker name.
Retargeted visitors convert at three to five times the rate of cold audiences because they already know your event exists and chose not to leave permanently.
Days 21 to 30: Close with urgency
Urgency is your most powerful conversion lever in the final stretch. Activate early-bird deadline messaging on day 21 across all active channels, including a dedicated email on day 21 and a follow-up on day 27. Shift your paid search budget upward by 20 to 30 percent during this window to capture high-intent searches from people who are actively comparing options and ready to commit. Send one final email on day 29 with a clear subject line such as “Registration closes tomorrow” and a single call to action linking directly to your event page.
Next steps for event advertising
You now have every piece of a complete event advertising system: a clear goal-setting process, channel selection logic, copy and creative frameworks, budget allocation guidelines, and a 30-day execution plan built around the three phases that drive real registration numbers. The difference between organizers who fill their events and those who scramble in the final week comes down to starting earlier and layering more deliberately than everyone else in the room.
Pick one element from this guide and act on it today. Set your single measurable goal, draft your audience profile, or audit your existing event page against the checklist in section three. Small, consistent steps compound faster than a perfect plan you never execute.
If your next event needs a physical brand presence that stops foot traffic and generates organic social content on its own, custom inflatables and branded installations are worth building into your budget early. Looking for more inspiration? Checkout this board.
Request a custom inflatable quote and get your physical activation into the plan before your event date locks.