
Inflatable arches are one of the most versatile tools in event marketing, but choosing the right one takes more thought than most people expect. Whether you’re marking the start line of a marathon, framing a product launch, or creating a branded entrance for a trade show, this inflatable arches ultimate guide covers everything you need to know. From arch styles and materials to setup logistics and long-term care, we’re breaking it all down so you can make a confident investment.
At TMP Inflatables, we’ve been designing and producing custom inflatable arches since 2004. Over two decades, we’ve helped marketing teams, event planners, and agencies across the U.S., Canada, and beyond turn their branding concepts into physical, attention-grabbing structures. That hands-on experience shapes every recommendation in this guide, these aren’t generic tips pulled from a spec sheet. They come from thousands of real projects and real client conversations. Here is the Inflatable Arches Ultimate Guide:
The Inflatable Arches Ultimate Guide contains a clear walkthrough of how to choose the right inflatable arch for your event, how to customize it for maximum brand impact, how to set it up properly, and how to maintain it so it lasts across dozens of activations. Let’s get into it.
Inflatable Arches Ultimate Guide to Why inflatable arches work so well at events
Inflatable arches have a straightforward advantage over most event structures: they’re impossible to miss. When you place a 20-foot branded arch at the entrance of a venue or across a race finish line, it does the work that a dozen smaller signs could never do combined. The visual impact is immediate, and it scales with your event whether you’re running a neighborhood 5K or a major brand activation drawing thousands of attendees from across a region.
Visibility that earns its footprint
The physical height and shape of an inflatable arch creates what experienced marketers call “ownable space.” When your arch is up, your brand commands that entire sightline. Attendees, spectators, and even people passing by on the street see your logo and colors before they see anything else at the venue. That’s not an accident. It’s a structural advantage that’s built directly into the format, and no banner stand or pop-up display replicates it.
The moment your arch goes up, it becomes the visual anchor of your entire event footprint.
Beyond raw height, inflatable arches hold their shape in outdoor conditions that would flatten banners, topple lightweight frames, or leave printed signage looking worn by midday. A properly staked or weighted arch stays upright in moderate wind without a crew standing by to adjust it. You set it up once, and it performs consistently for hours without intervention.
Branding that travels with you
Unlike a tent, a temporary stage, or a truss system, an inflatable arch is completely brandable on every visible surface. Your logo, brand colors, sponsor names, and campaign messaging get printed directly onto the material using high-resolution digital graphics. What you design is what attendees see, with no generic panels, no exposed frame, and no wasted space.
Portability adds another layer of value that most buyers don’t consider until they’re planning their second or third event. A complete inflatable arch folds down into a carry bag compact enough to fit in a standard vehicle, check on a commercial flight, or ship ahead to the venue. For marketing teams running activations across multiple cities or coordinating events on tight timelines, that kind of reliability is not a small thing.
For anyone working through this inflatable arches ultimate guide, those two factors together, maximum visibility and genuine portability, explain why so many brands keep coming back to inflatable arches season after season. The format consistently delivers results that larger, heavier, and more expensive structures struggle to match.
Inflatable Arches Ultimate Guide to Types, materials, and graphics options
Before you order anything, you need to understand how arch design, construction material, and graphics method all affect your final result. Each choice you make at this stage directly shapes how your arch performs on-site, how long it lasts, and how well it represents your brand.
Arch styles for different events
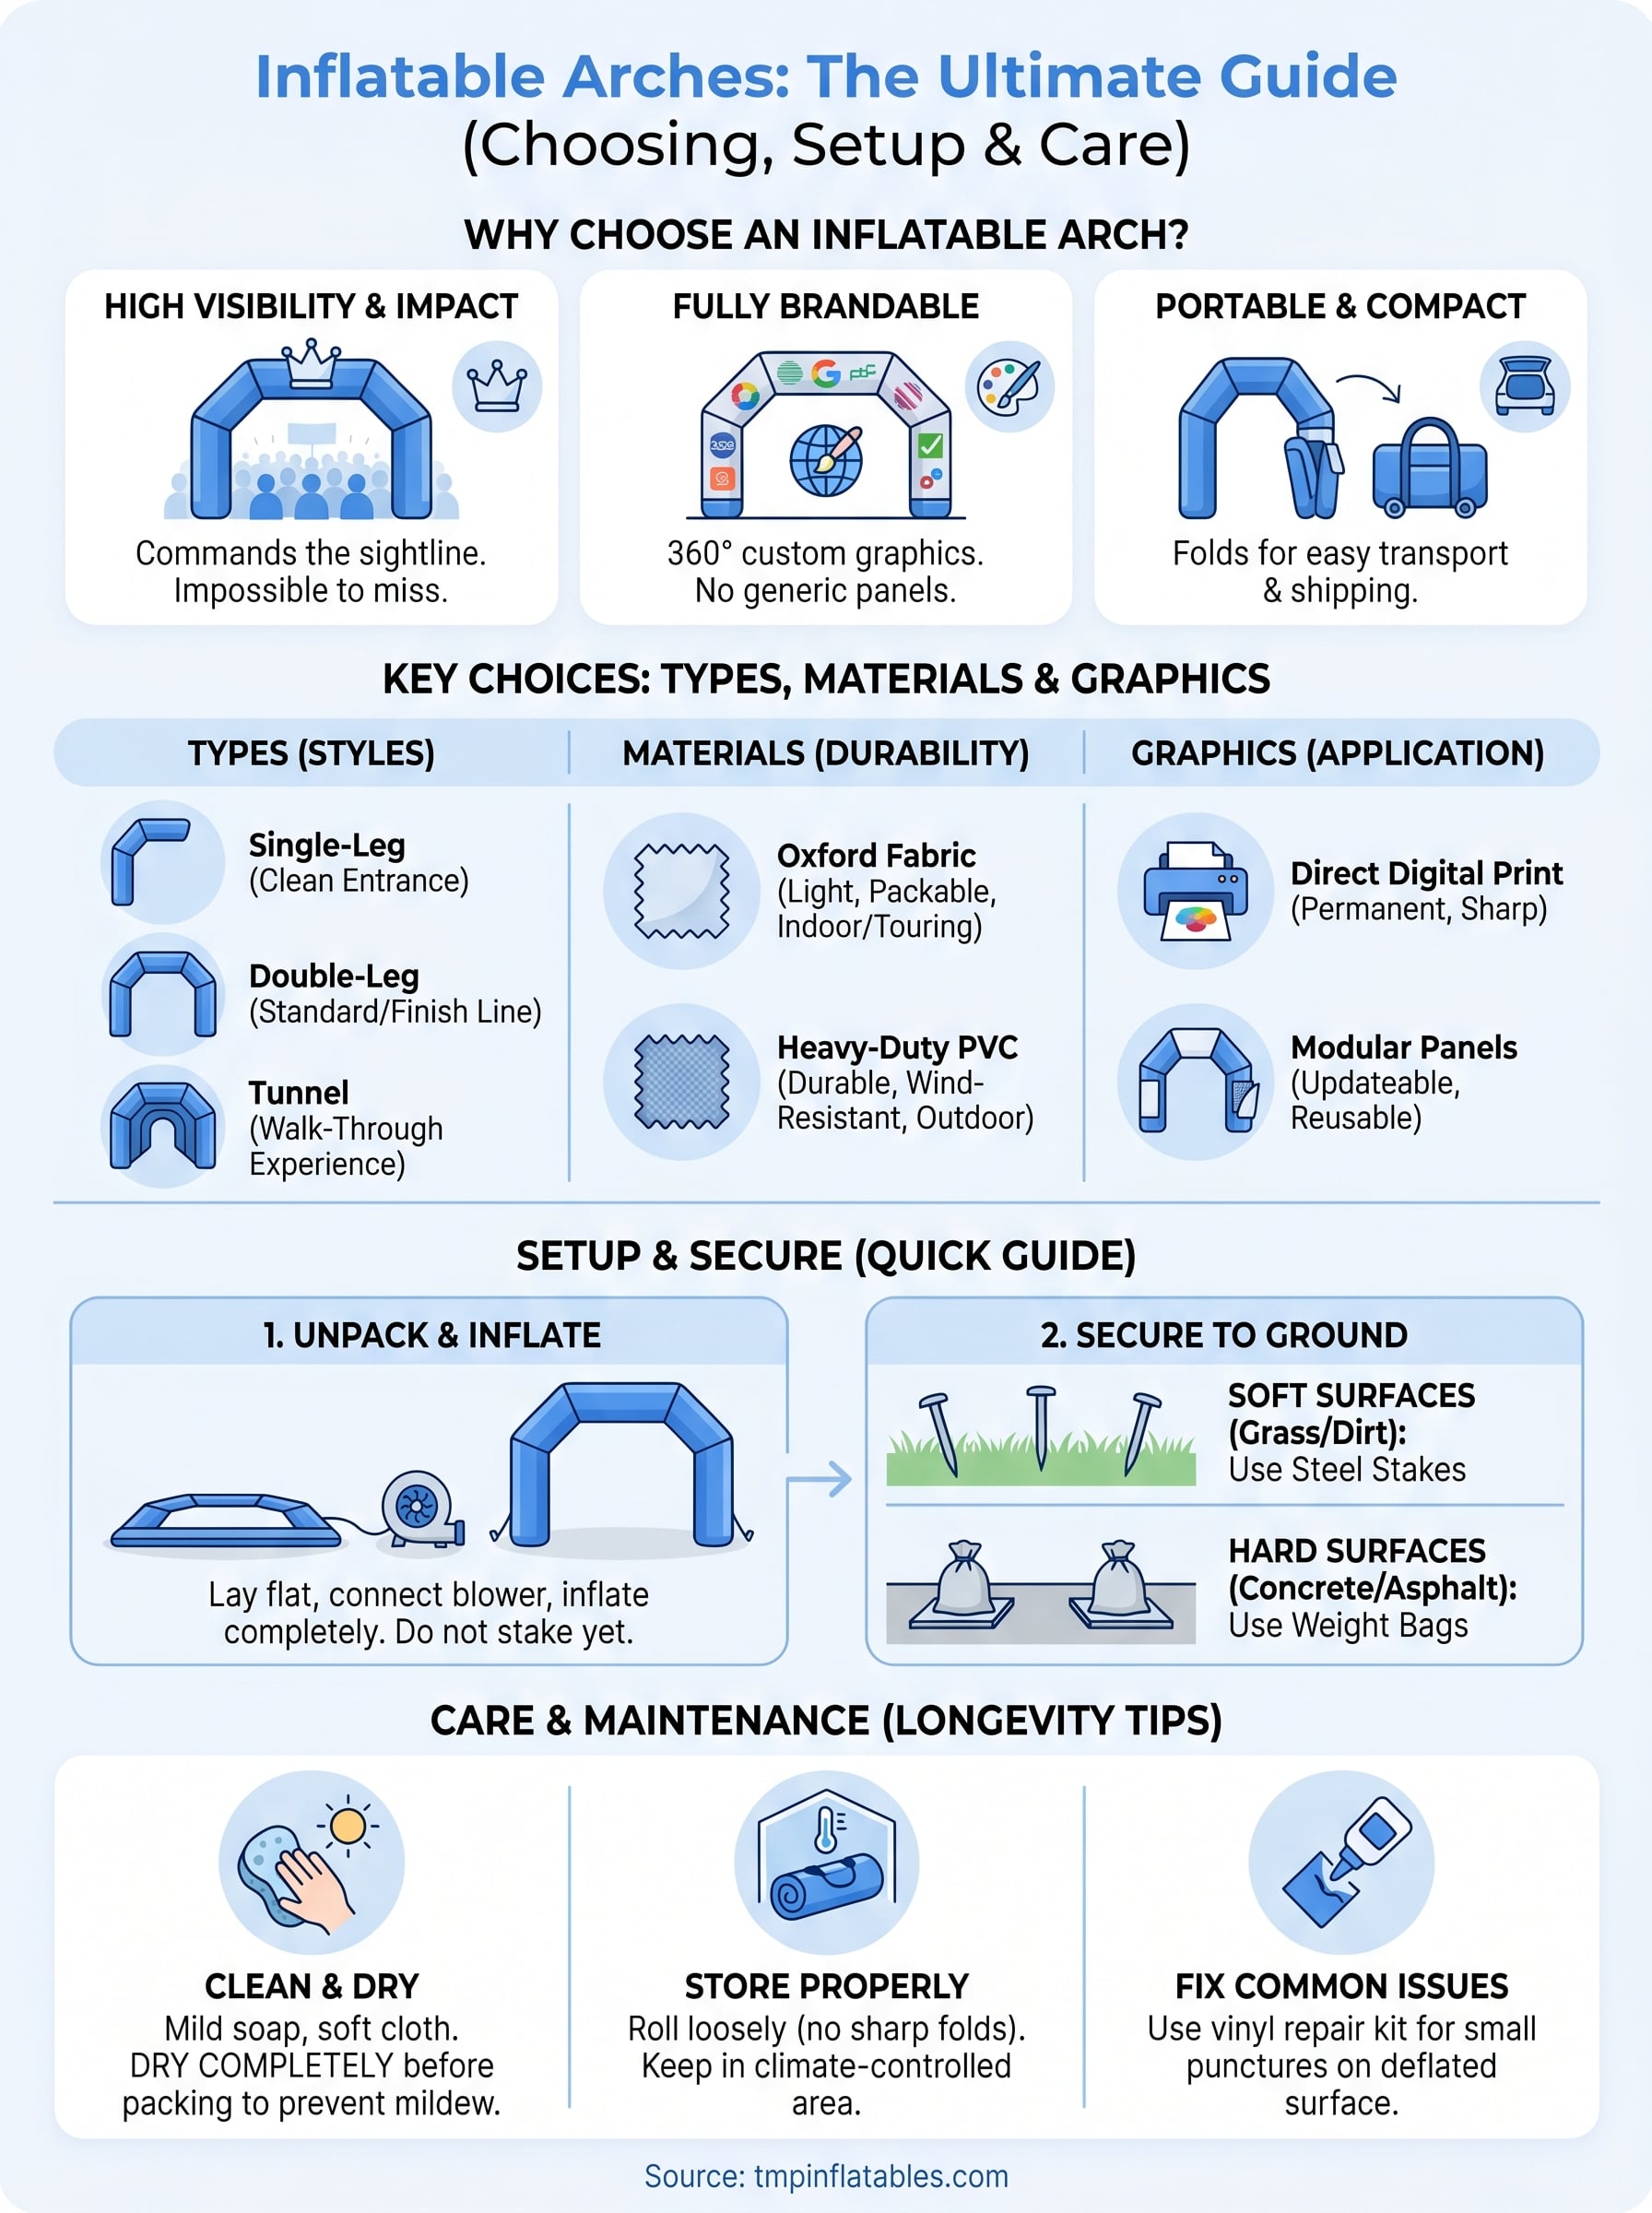
Inflatable arches come in a handful of core shapes, and the right one depends on your setup location and how you plan to use it. Single-leg arches work well when you need a clean, unobstructed entrance without footprint on both sides of the opening. Double-leg or traditional arches give you more surface area for graphics and stand up well at finish lines, trade show entrances, and brand activation zones. Some manufacturers also offer tunnel arches, which extend the branded environment further and create a walk-through experience rather than just a visual frame.
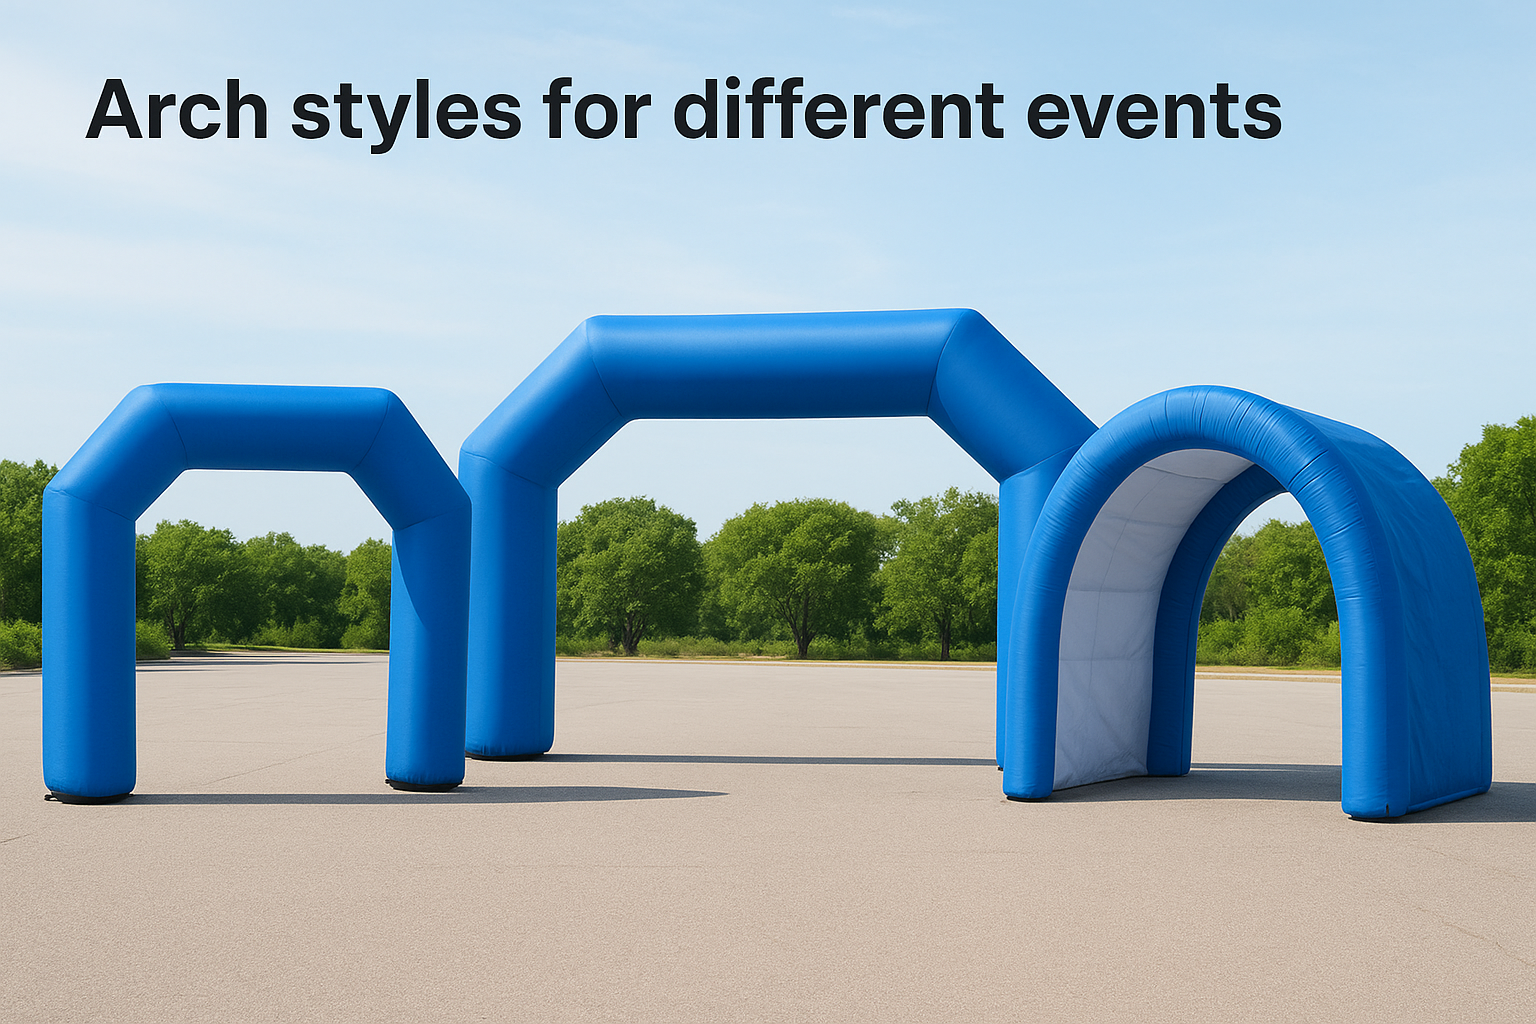
Matching the arch style to your venue layout before production starts saves you significant rework and added costs.
Materials that handle real conditions
Oxford fabric and PVC-coated nylon are the two most common base materials for commercial inflatable arches. Oxford fabric is lighter and easier to pack, which makes it a strong choice for touring activations where you ship the arch frequently. Heavy-duty PVC adds durability and wind resistance, making it better suited for outdoor events with unpredictable weather. At TMP Inflatables, we specify materials based on your event environment, not just your budget.
How graphics get applied
Your branding goes on through direct digital printing, which bonds ink directly to the fabric surface for sharp, color-accurate results that hold up across multiple setups. For arches that need to display multiple sponsor logos or campaign messages, modular panel printing lets you update individual sections without reprinting the entire structure. This keeps your investment relevant across multiple events without a full reorder each time.
Inflatable Arches Ultimate Guide on How to choose the right arch for your event
Choosing the right inflatable arch comes down to four practical variables: event type, location, audience size, and your production timeline. This inflatable arches ultimate guide has covered the available options, but narrowing to the right one for your specific event requires honest answers to a few direct questions before you commit to a design.
Match size to your venue and crowd
Arch height and width need to align with your setup location, not just your aesthetic preference. A 15-foot arch placed inside a convention hall requires different rigging and clearance than a 25-foot arch spanning an outdoor road race. Measure your opening width and ceiling or overhead clearance first, then work backward to the arch dimensions that fit that space without modifications on-site.
Your expected crowd size also matters. For events drawing hundreds of people, a compact arch does the job. For thousands of attendees spread across a large outdoor footprint, you need additional height and wider coverage so your branding reads clearly from a distance.
Size the arch to your audience’s viewing distance, not just to the entrance opening itself.
Factor in timeline and reuse plans
Production time for a custom inflatable arch typically runs three to six weeks, depending on complexity and current lead times. If your event date is firm, work backward from that deadline before you finalize a design. Rushing production increases costs and limits your revision options.
Also think about how many times you plan to use the arch across your event calendar. A single activation may justify a lighter-spec build. If you’re running the same arch across a full season of events, invest in heavier materials and reinforced anchor points from the start. That upfront decision protects your budget over the long run.
Inflatable Arches Ultimate Guide on How to set up and secure an inflatable arch
Setting up an inflatable arch is straightforward when you follow the right sequence from the start. Most crews complete setup in under 10 minutes once they’ve done it a few times, but your first deployment goes smoothest when you read through the process before you arrive on-site. This inflatable arches ultimate guide gives you the full picture, so there are no surprises when your event window is tight.
Unpacking and inflation
Start by laying the arch flat on a clean surface and confirming all anchor points, bladders, and valve covers are in good condition before you connect any blower. Debris caught under the material during inflation can cause abrasion damage that shortens the arch’s lifespan. Once you’re clear, connect your electric blower to the main inflation valve and let the structure fill completely before you attempt to raise it. Most arches reach full inflation in three to five minutes depending on volume.
Never stake or weight an arch before it reaches full inflation, since the shape and anchor alignment shift significantly as the structure fills.
Securing the arch to the ground
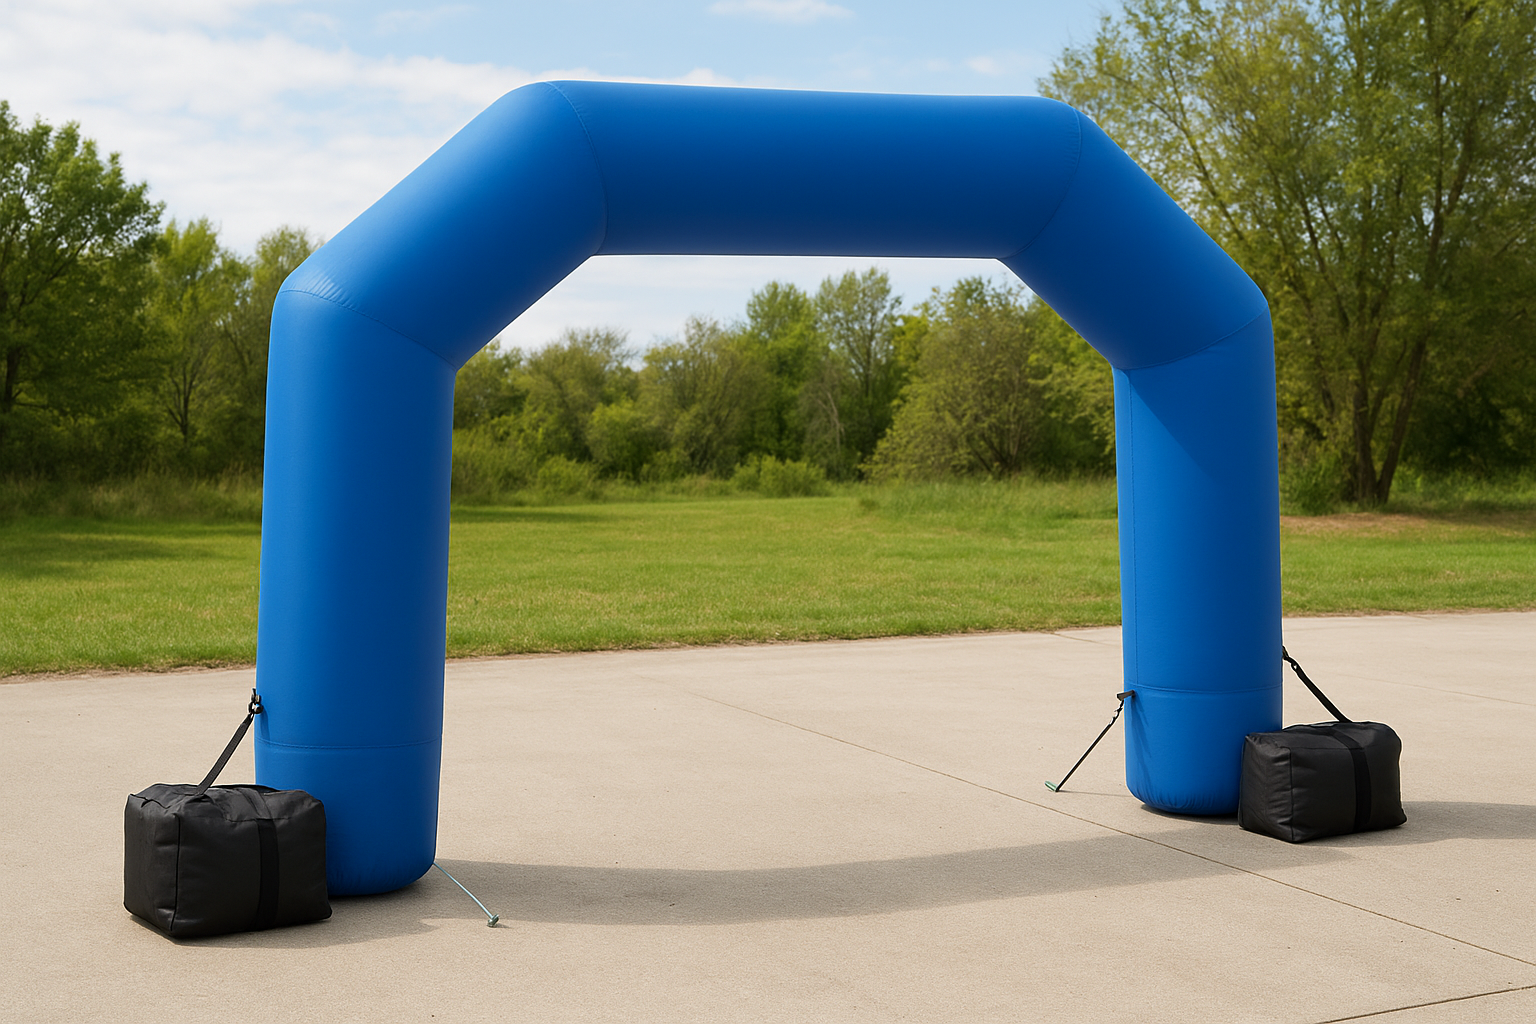
How you anchor your arch depends entirely on the surface below it. On grass or packed dirt, steel ground stakes driven through the anchor loops at each base leg give you the most reliable hold in moderate wind. On concrete, asphalt, or indoor flooring, water-filled or sand-filled weight bags attached to the base rings keep the structure stable without damaging the surface. For high-wind outdoor events, use both methods together. Check every anchor point after the first 10 minutes of inflation since material tension shifts slightly as the arch reaches operating pressure, and loose connections at that stage create instability later.
Inflatable Arches Ultimate Guide on How to clean, store, and fix common issues
Proper care after each event determines how long your arch stays in service. Dirt, moisture, and improper folding cause most of the damage that shows up over time, and all three are entirely preventable with a consistent post-event routine that takes under 20 minutes to complete.
Cleaning and drying the material
Wipe down the full surface with a mild soap solution and a soft cloth after every activation. Avoid pressure washers and harsh chemicals since both degrade printed graphics and weaken seam adhesion along the edges. Dry the arch completely before folding, because even slight moisture trapped inside the packed material leads to mildew growth and fabric breakdown that no repair kit can fully reverse.
A few extra minutes of drying time at the event site prevents a costly reprint or full replacement.
- Avoid petroleum-based cleaners at all times
- Use soft cloths only, never abrasive scrubbing pads
- Keep the blower port open while the material finishes drying
Inflatable Arches Ultimate Guide on Storing the arch correctly
Roll the arch loosely rather than folding it sharply along the same crease after each event. Repeated sharp folds stress the fabric at those contact points and eventually cause cracking or delamination that weakens the structure.
Store the packed arch in its carry bag inside a climate-controlled space away from direct sunlight and temperature extremes. High heat accelerates PVC breakdown, and freezing temperatures make the material brittle and prone to cracking at the seams.
Fixing common problems on-site
This inflatable arches ultimate guide wouldn’t be complete without practical repair guidance. Small punctures and seam separations are fixable with a vinyl repair kit, which most suppliers include with your order. Clean the area around the damage, apply the patch to a fully deflated surface, and allow the adhesive to cure for at least 30 minutes before re-inflating. For larger tears or blower failures, contact your supplier directly before attempting a fix that could make the damage significantly worse.
Inflatable Arches Ultimate Guide Next steps for your inflatable arch
This inflatable arches ultimate guide has covered everything from arch types and materials to setup, anchoring, and post-event care. At this point, you have a clear framework for making a purchase decision that holds up across multiple events and budget cycles.
Your next move is to define the specifics: event date, location type, size requirements, and how many activations you plan to run in the next 12 months. Those details drive every production decision, from material spec to graphics method to lead time planning. The sooner you lock them in, the more options you have.
TMP Inflatables has been producing custom inflatable arches for over 20 years, and our team works directly with you through every stage from concept to delivery. We hope Inflatable Arches Ultimate Guide has given you some key information. When you’re ready to move forward, request a custom quote and we’ll help you build the right arch for your event.