

Whether you’re planning a product launch, a branded activation, or a trade show booth that actually stops people in their tracks, custom inflatables raise a lot of questions before you place an order. We hear them every day at TMP Inflatables. After 20+ years designing and producing custom inflatables for marketing agencies, event planners, and brand teams across North America, we’ve compiled the most common inflatables FAQs into one straightforward resource.
Below, you’ll find honest answers to 10 frequently asked questions covering everything from how custom pricing works to setup logistics, safety considerations, and shipping timelines. Each answer draws directly from our experience managing projects from initial concept through delivery, so you’re getting practical information, not guesswork.
If you’re evaluating whether a custom inflatable is right for your next campaign or event, this guide will give you the clarity you need to make a confident decision, and know exactly what to expect from the ordering process before you commit.
Inflatables FAQs 1. What inflatables can TMP design and build?
TMP Inflatables goes well beyond the standard bounce house or basic balloon arch. The product range covers large-scale promotional inflatables, functional event structures, and wearable costume pieces, all built to your brand specifications. If you’re asking this question as part of your inflatables FAQs research, this section will show you exactly where to start.
Quick answer
TMP designs and produces custom inflatables across a wide range of categories, including giant product replicas, inflatable tents, archways, air dancers, mascot costumes, trade show displays, and pool floaties. Every product can be branded, sized, and shaped to match your specific campaign goals.
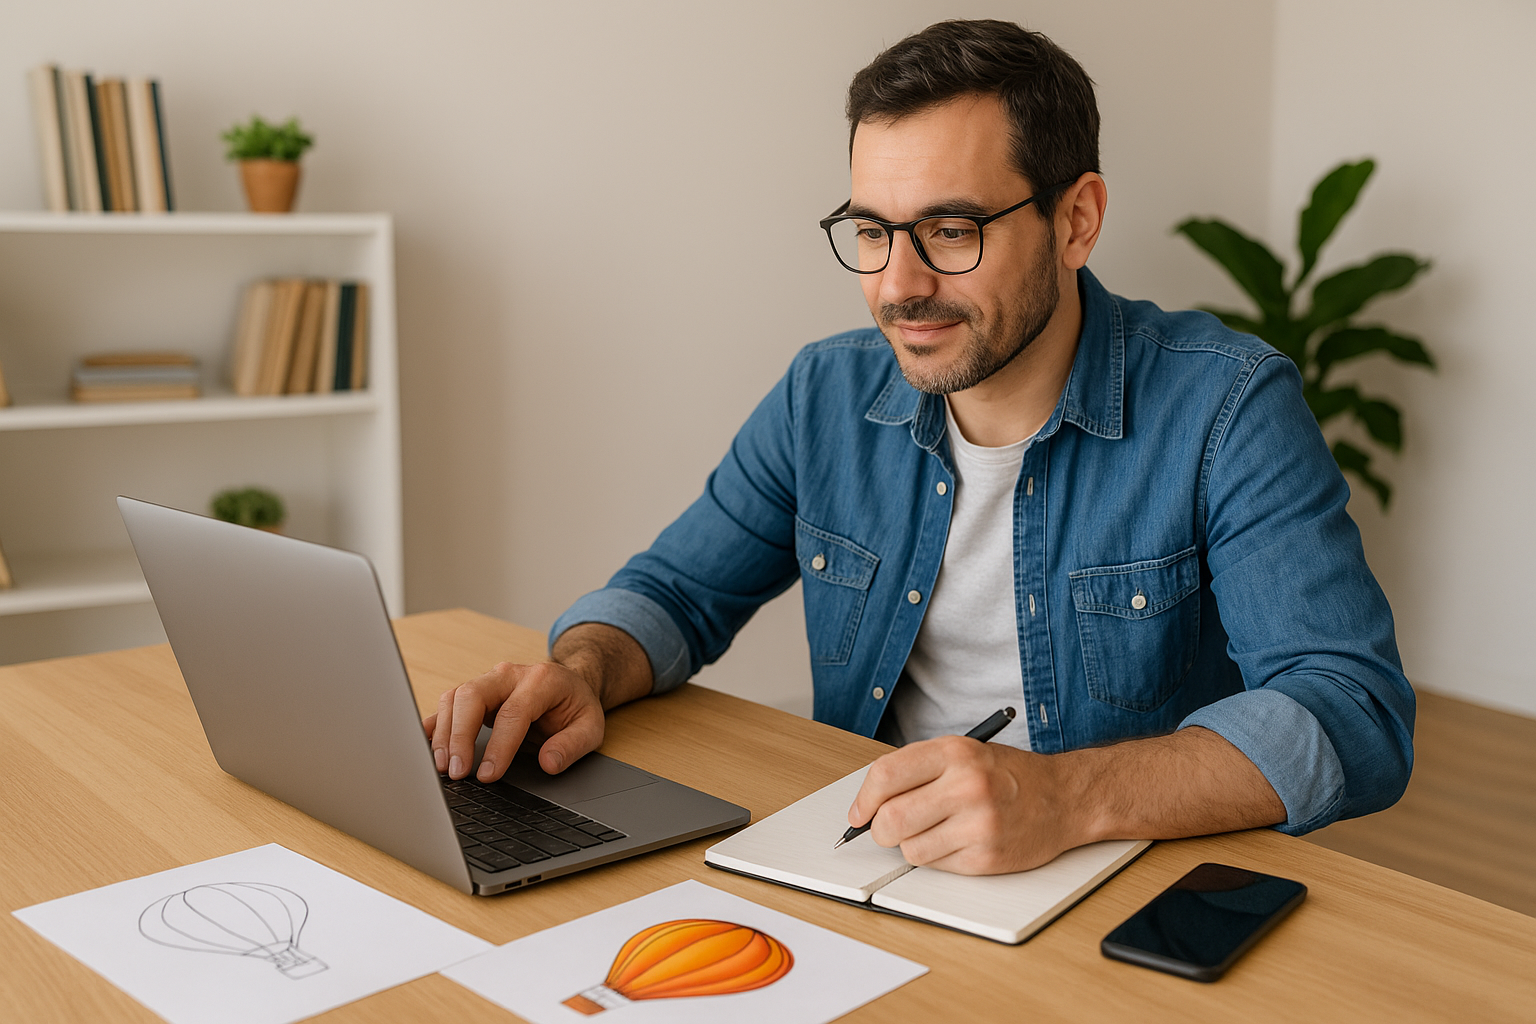
If you can sketch it or describe it, TMP can typically engineer and build it with the right specs and lead time.
Options and common use cases
The product lineup covers more scenarios than most clients expect when they first reach out. Here are the main categories and where each tends to get used:
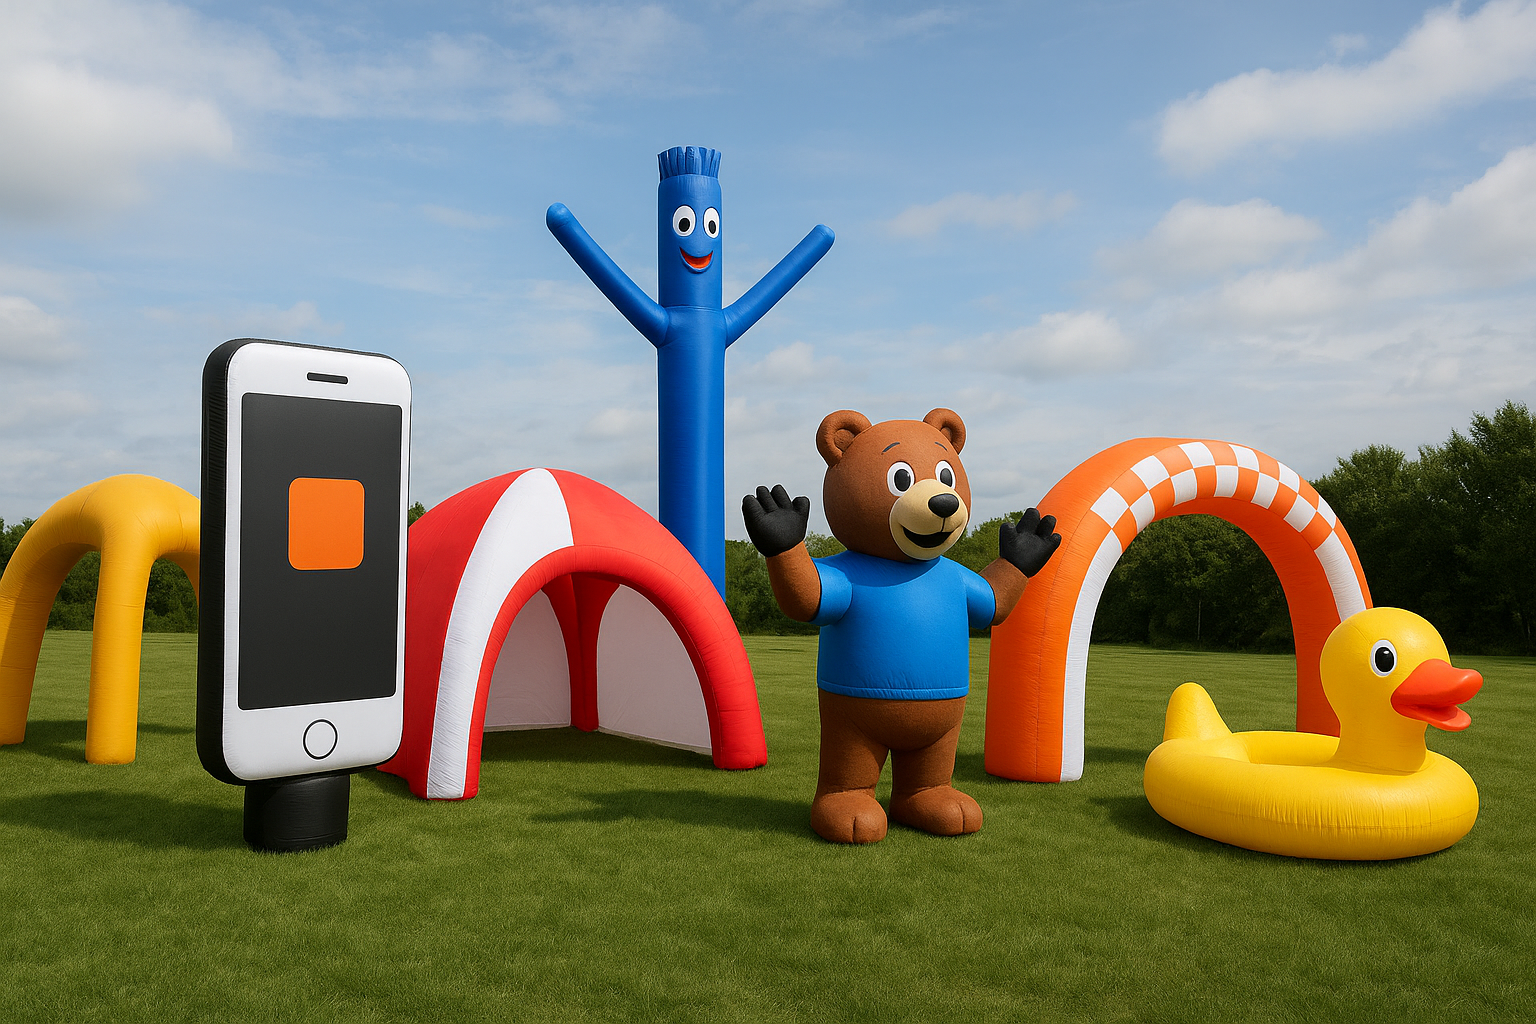
- Giant product replicas and characters: Product launches, retail displays, and outdoor brand activations where you need immediate visual impact
- Inflatable tents and domes: Branded hospitality areas, pop-up retail, and experiential spaces at festivals or sporting events
- Inflatable arches: Finish lines, event entrances, and branded walkways for races, grand openings, and sponsor activations
- Air dancers and tube men: High-traffic roadside promotions, dealership events, and retail foot traffic drives
- Inflatable costumes and mascots: Live brand experiences, stadium events, and parades where staff wear the brand
- Trade show display inflatables: Lightweight, portable structures that set up fast in convention environments
- Misting tents: Outdoor summer events where attendee comfort and brand visibility need to work together
- Pool floaties: Branded promotional merchandise for consumer giveaways and lifestyle campaigns
Specs to decide before you request pricing
Before you contact TMP for a quote, nailing down a few details will make the conversation faster and the estimate more accurate.
- Size: Height, width, and footprint in feet or meters
- Quantity: Single unit or a run of multiple pieces
- Use case: Indoor, outdoor, or wearable
- Branding complexity: Single color logo versus full-wrap print
- Timeline: Your firm event date or campaign launch window
Inflatables FAQs 2. How does the custom inflatable process work?
Understanding the production process upfront helps you plan your timeline and avoid last-minute surprises. This is one of the most common inflatables FAQs we receive, and the answer is more straightforward than most clients expect when they first reach out to TMP.
Quick answer
TMP manages the full project lifecycle from your initial concept through design, production, and delivery. You share your vision, TMP’s team develops artwork and engineering specs for your approval, production begins once you sign off, and the finished inflatable ships directly to your location.
The single biggest cause of delays is waiting on client artwork approvals, so building review time into your schedule before the production window is critical.
Typical steps from concept to delivery
The process follows a clear sequence so you always know where your project stands. Here are the core stages in order:
- Discovery call: You share your concept, size requirements, and event date
- Design and quote: TMP prepares a design proof and pricing for your review
- Approval and deposit: You approve the design and submit payment to start production
- Production: TMP builds and quality-checks your inflatable
- Shipping: Your finished product ships to the confirmed delivery address
What speeds up approvals and avoids rework
Providing clear reference materials at the start saves significant back-and-forth. Send your brand guidelines, logo files in vector format, and any physical product images you want replicated. The more specific your brief and dimensions are upfront, the fewer revision rounds you will need before production starts.
Inflatables FAQS 3. What drives the price of a custom inflatable?
Pricing is one of the more nuanced inflatables faqs to answer, because no two projects are identical. Size, material complexity, and print coverage are the three variables that move the number most, and understanding them upfront helps you plan your budget before requesting a formal quote.
Quick answer
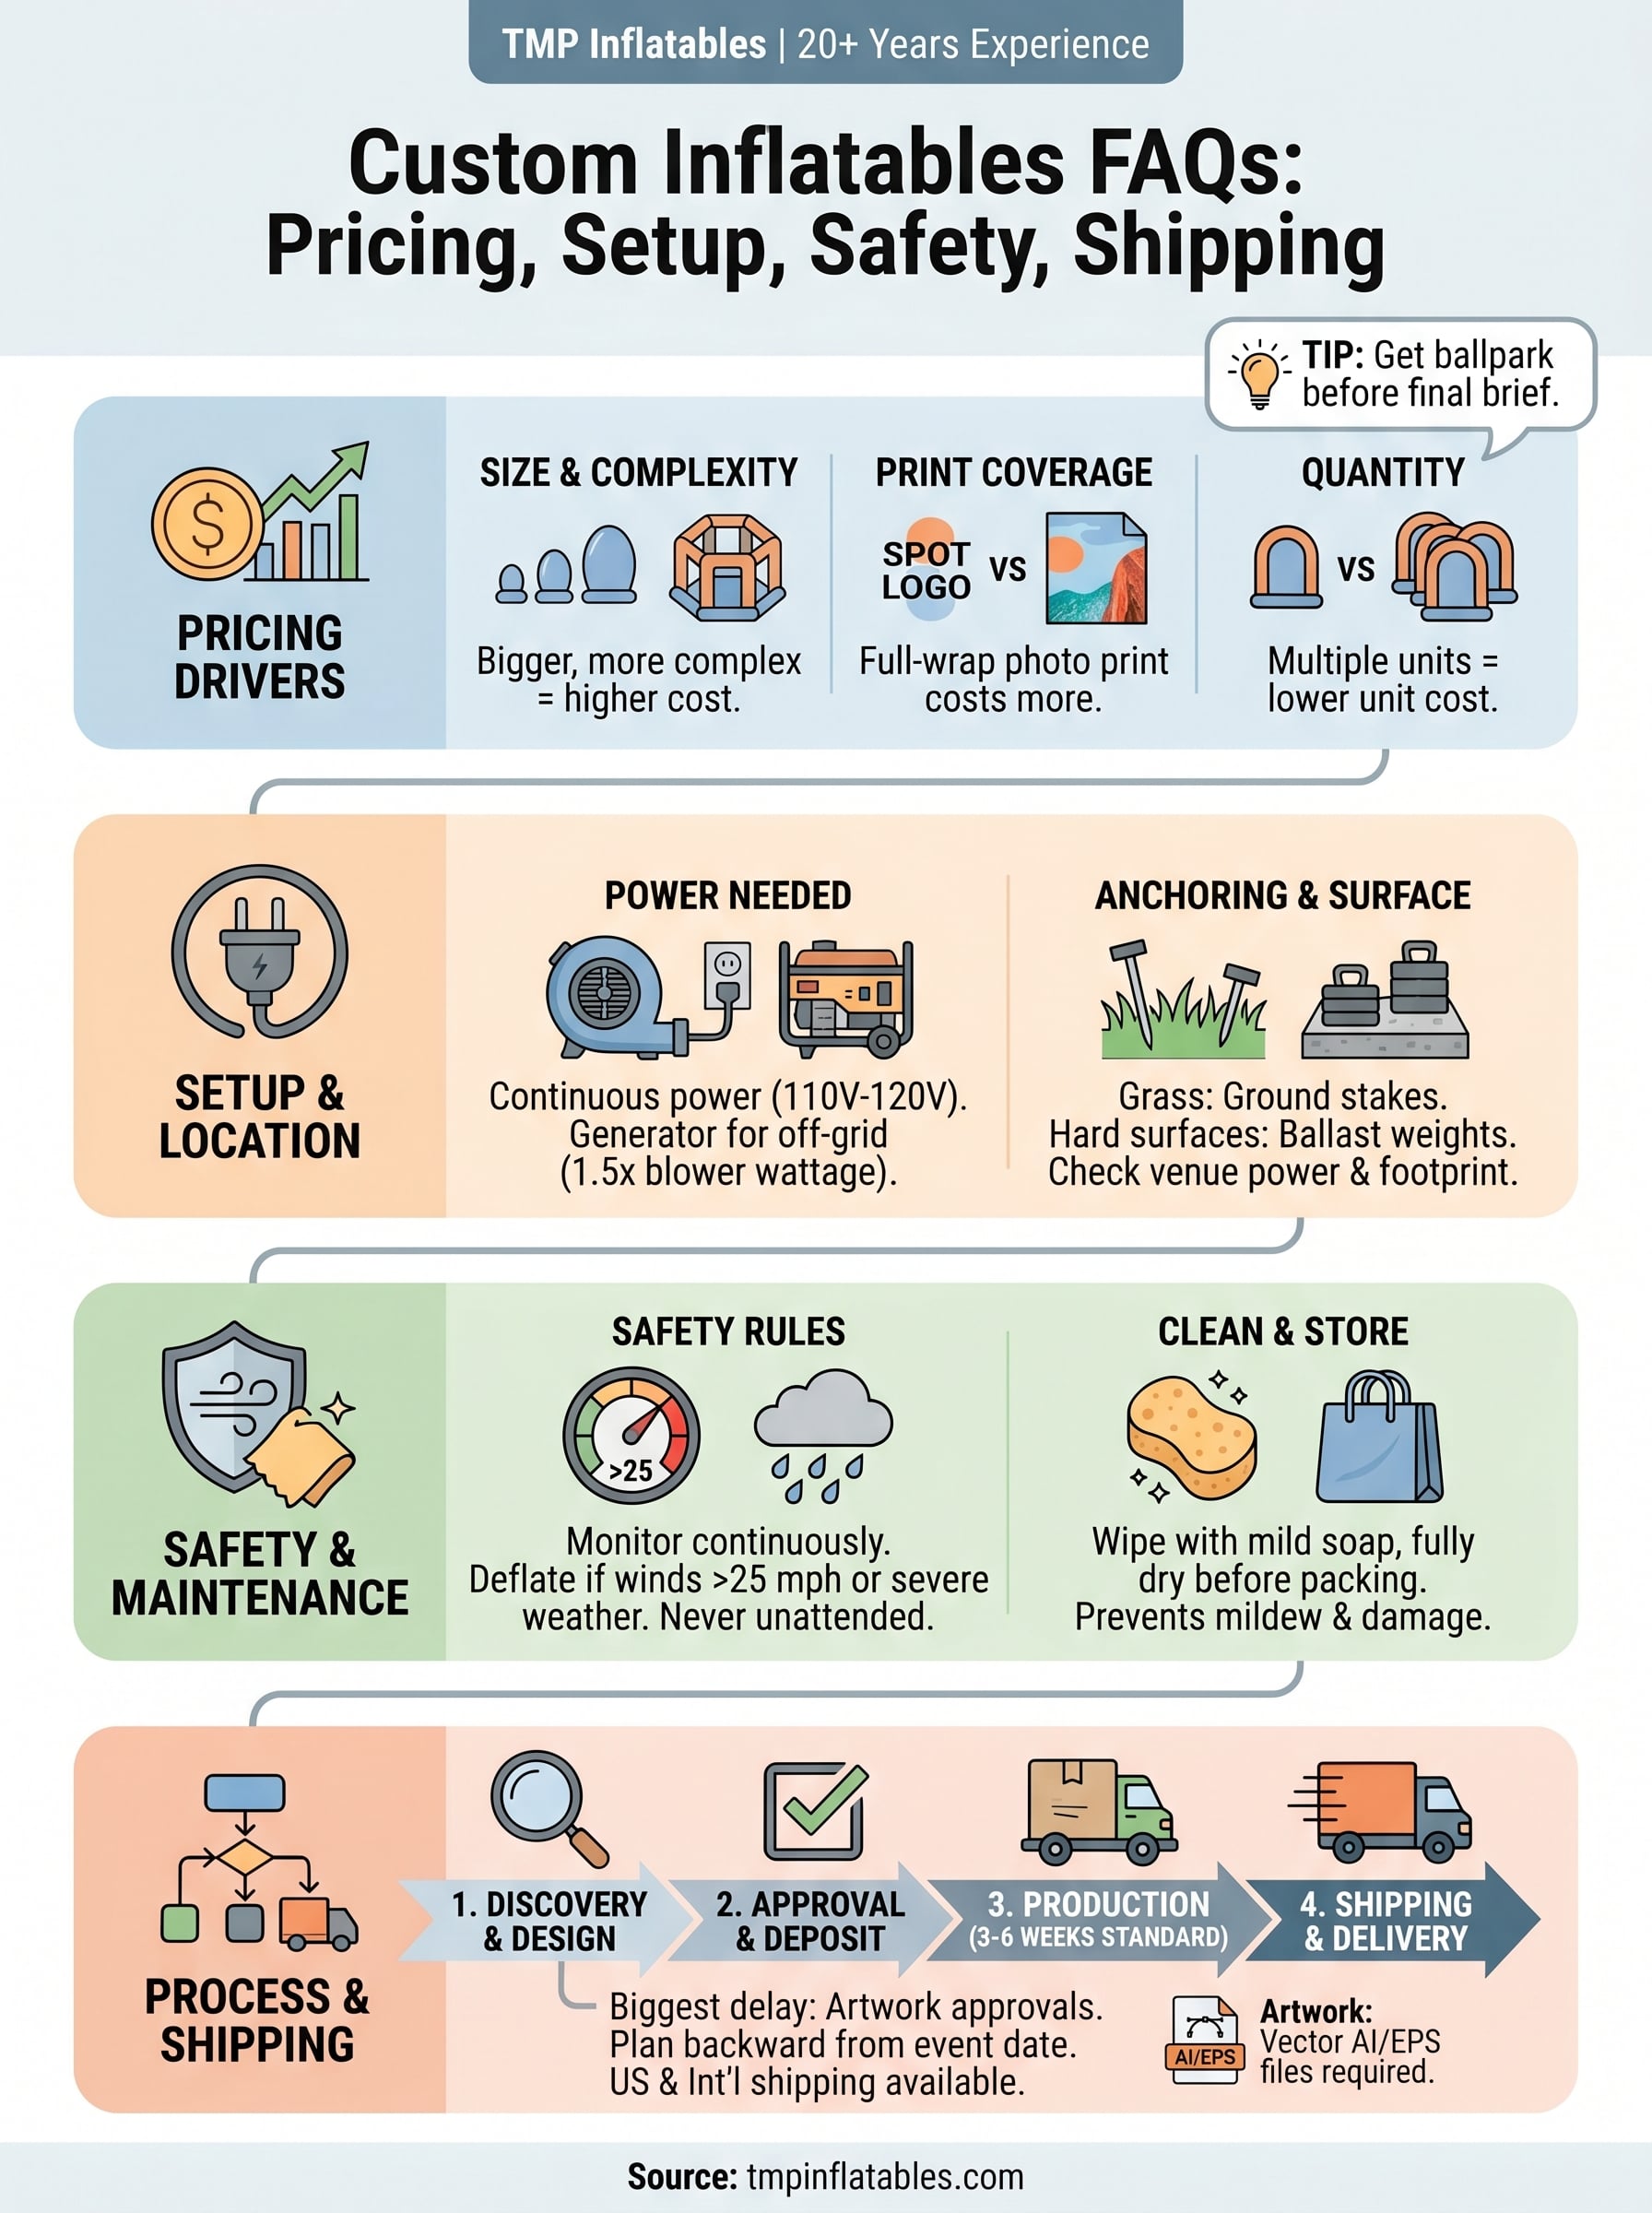
Custom inflatable pricing depends on size, structural complexity, print detail, quantity, and your required timeline. A single-color air dancer costs far less than a full-wrap, double-sided product replica with interior lighting. The more specific your brief, the more accurate your estimate will be.
Getting a ballpark figure before finalizing your design brief is one of the fastest ways to avoid scope creep during production.
The biggest cost factors
Several variables combine to set the final price on any custom build:
- Size and volume: Larger inflatables require more raw material and longer production hours
- Structural complexity: Multi-chamber shapes and internal frames add engineering and labor time
- Print coverage: Full-wrap, photorealistic prints cost significantly more than spot-color logos
- Quantity: Single units carry no volume discount; ordering multiples in one run lowers the unit cost
- Rush production: Compressing the standard timeline adds a fee on top of base pricing
How to lower cost without lowering impact
You don’t need to sacrifice visibility to stay within budget. Simplifying the shape while keeping your full-color branding on the highest-visibility panels delivers strong impact at a lower production cost. Placing multiple units in a single production run also reduces per-unit cost considerably compared to separate orders placed weeks apart.
Inflatables FAQs 4. How long does custom production take?
Production timelines are one of the most time-sensitive inflatables faqs to get right before you commit to a project. Missing your event date because production ran long is an avoidable problem, and knowing the standard windows helps you build a realistic schedule from day one.
Quick answer
Standard custom production runs between 3 and 6 weeks from the moment you approve your design and submit your deposit. More complex builds with multiple chambers, interior lighting, or large-scale structures can push that window to 8 weeks or more.
Plan your order date backward from your event date, not forward from when you feel ready to start.
Typical timelines and what changes them
Most straightforward builds, like single-chamber air dancers or simple archways, land closer to the 3-week mark. Multi-part structures, full-wrap printed replicas, and custom inflatable costumes typically take 5 to 6 weeks. Rush production is available in some cases, but it adds cost and depends on current factory capacity, so it should not be your default assumption when planning a campaign.
Deadline planning for events and launches
Give yourself a minimum two-week buffer between your confirmed delivery date and your event. Freight carrier delays and customs clearance for cross-border shipments are real variables that sit entirely outside production control. Sharing your firm event date with TMP at the very start of your project lets the team flag timeline risks before production begins, which is far easier to solve than a delay discovered two weeks out.
Inflatables FAQs 5. How does shipping work in the US and abroad?
Shipping logistics are one of the more practical inflatables faqs to understand before you place an order. TMP Inflatables is based in Canada but maintains an international shipping network that covers the United States, the Caribbean, and Latin America, so your location rarely restricts what you can order or receive.
Quick answer
TMP coordinates freight from production through final delivery to your specified address. Domestic US orders move via ground or air freight based on size and urgency, while international shipments require customs documentation and may carry import duties depending on the destination country.
Build customs clearance time into your delivery window, especially for events with a fixed setup date you cannot move.
Freight, duties, and delivery locations
TMP ships completed inflatables to commercial addresses, event venues, and freight terminals across North America and internationally. Large structures travel on pallets via LTL freight carriers. For cross-border orders, TMP prepares export documentation from the shipping origin, but import duties and local customs fees fall to the receiving party at the destination.
Your freight carrier and routing options vary based on product dimensions and urgency, so sharing both your delivery address and your required arrival date early in the process gives TMP the best chance to match you with the right shipping method.
What to confirm for smooth cross-border delivery
Before your inflatable ships, verify a few practical details to prevent delays at customs or on delivery day. Confirm your exact delivery address type, since residential addresses often require different freight arrangements than a commercial loading dock.
Also clarify whether your venue needs a liftgate truck for unloading heavy pallets, and ensure someone will be on-site to receive and sign for the shipment on the confirmed delivery date.
Inflatables FAQs 6. What power and equipment do inflatables need?
Power planning is one of the most overlooked logistics in any inflatables faqs discussion, yet it’s one of the first things that can derail your event day if you skip it. Every inflatable requires a continuous power source to keep its blower running, and knowing your requirements before you arrive on-site prevents a lot of frustration.
Quick answer
All continuous-inflation inflatables need a dedicated blower running throughout the event. Standard blowers in North America run on 110V to 120V power, though larger structures may require 220V or multiple circuits. If you’re setting up without access to a power grid, a generator is your only option.
Confirm your venue’s power availability and circuit capacity before your event date, not on the morning of setup.
Blowers, voltage, and generator planning
TMP supplies blowers matched to the specific inflatable you order, so you won’t need to source your own separately. For generator planning, size your generator at roughly 1.5 times the blower’s wattage rating to handle startup surge without tripping the breaker. Outdoor venues, parks, and temporary event sites almost always require a generator.
Common power mistakes that cause deflation
The most frequent issue is running an inflatable on an undersized extension cord, which causes voltage drop and makes the blower overheat. Always use a heavy-gauge, outdoor-rated cord no longer than 50 feet when connecting to a power source. A tripped breaker mid-event is avoidable with the right setup.
Inflatables FAQs 7. Where can you set up, and how do you anchor?
Setup location is one of the more practical inflatables faqs to work through before your event day. Most inflatables work across a wide range of environments, but surface type, available footprint, and site access all affect what you can safely deploy and how you need to anchor it.
Surfaces, space, and access requirements
Outdoor grass and turf are the most straightforward surfaces to work with because they accept standard ground stakes directly. Hard surfaces like concrete, asphalt, and pavement require ballast weights instead of stakes, so confirm your surface type before your setup crew arrives. Indoor setups at convention centers or retail spaces add a ceiling height requirement you must verify against your inflatable’s full dimensions before delivery.
Beyond the surface, you need clear overhead clearance and enough ground footprint for both the inflatable and its tether lines. A practical rule is to add at least 5 feet of buffer around the full perimeter of the base.
Anchoring methods for grass and hard surfaces
Ground stakes driven at a 45-degree angle provide the most reliable hold on grass and soft soil, and TMP supplies the appropriate anchoring hardware with your inflatable. On hard surfaces, sandbags or water-filled ballast weights attach to the tie-down points and keep the unit stable without damaging the pavement.
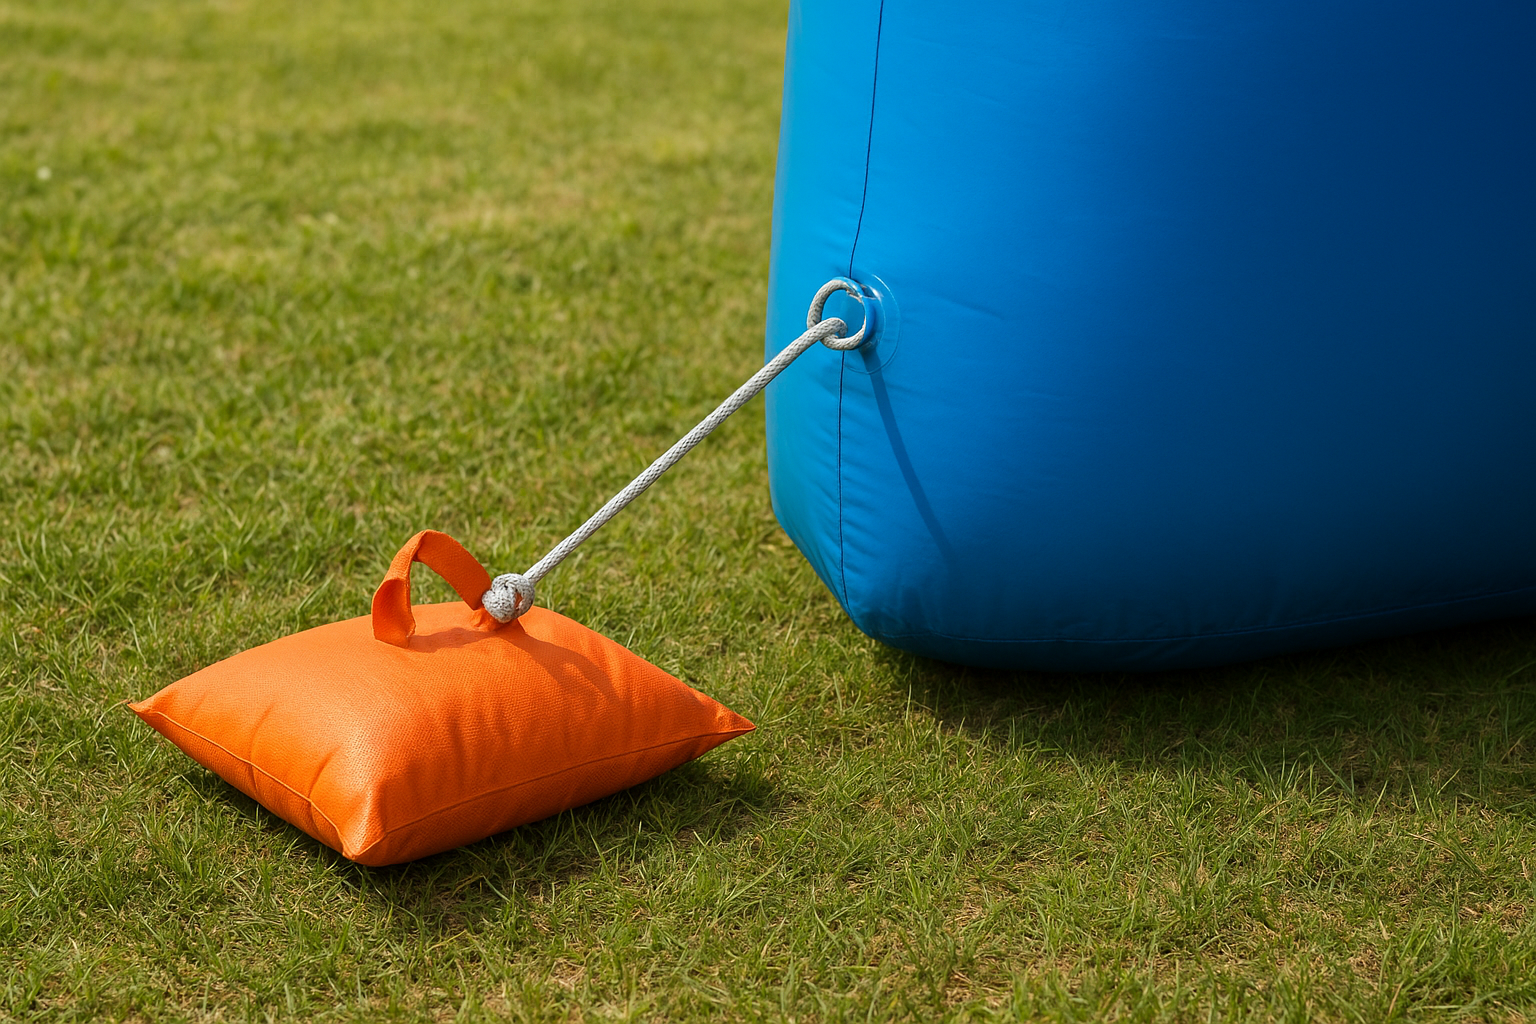
Never rely on a single anchor point regardless of surface type; distribute weight and tension across all available tie-down locations to prevent tipping or drifting during the event.
8. What safety rules should you follow on event day?
Safety on event day is one of the most practical inflatables faqs topics to review before your crew arrives. Skipping a pre-event safety check creates unnecessary risk for staff, attendees, and your equipment, so running through a short protocol at setup is always worth the time.
Quick answer
Keep your blower running continuously throughout the event, assign at least one staff member to monitor the inflatable at all times, and shut down immediately if wind speeds exceed 25 mph or if a severe weather warning is issued for your location.
Never leave an active inflatable unattended, even for a few minutes, especially in crowded public environments where conditions can change quickly.
Operating rules for staff and attendees
Your on-site staff should conduct a visual inspection of the inflatable before doors open or the event begins. Check all anchor points, confirm the blower is secured, and verify no seams or panels show visible stress.
- Keep bystanders at a safe distance from tether lines and stakes
- Assign one dedicated attendant whose only job is inflatable monitoring
- Restrict physical contact with the inflatable for decorative or display units not designed for interaction
Wind, weather, and shutdown guidelines
Wind is the primary environmental hazard for large inflatables, and it escalates faster than most event teams expect. Monitor local conditions throughout the event, not just at setup.
Deflate and secure your inflatable if sustained winds reach 25 mph or gusts exceed that threshold. Rain and lightning are automatic shutdown triggers with no exceptions.
Inflatables FAQs 9. How do you clean, store, and maintain inflatables?
Proper maintenance extends the life of your inflatable significantly, and most of the process requires no special equipment. This is one of the inflatables faqs that clients often overlook until after their first event, but building a simple routine from the start saves you repair costs down the road.
Cleaning, drying, and packing workflow
Wipe down all exterior panels with a mild soap solution and a soft cloth after every use. Avoid abrasive scrubbers or harsh chemical cleaners, as both can break down the coated fabric and fade printed graphics faster than normal wear.
Never pack or store an inflatable while it is still damp, as trapped moisture causes mildew that permanently damages the material and the print layer.
Fully inflate the unit after cleaning so you can inspect every panel before deflating for storage. Once dry, deflate completely, fold systematically from the far end toward the blower port, and pack it into the supplied storage bag without forcing or compressing the fabric.
Repair basics and when to stop using an inflatable
Small punctures and minor seam separations are repairable with a vinyl patch kit, which TMP can supply. Apply the patch to a clean, dry surface and allow full cure time before re-inflating. Most field repairs take under 30 minutes if you catch damage early.
Retire an inflatable when seam failures are recurring, the blower can no longer hold pressure, or structural panels show significant UV degradation that patches cannot address reliably.
Inflatables FAQs 10. What artwork files and branding details do you need?
Submitting the right artwork upfront is one of the most practical inflatables faqs topics to address before production starts. Sending incorrect files forces revision rounds that eat into your production window and can push your delivery date past your event.
Quick answer
TMP requires vector artwork files in AI or EPS format for logos and brand marks, along with your confirmed Pantone color codes and any placement instructions for how graphics should map across the inflatable surface.
Raster files like JPGs and PNGs are not acceptable substitutes for vector files when printing at large scale, as they lose resolution and produce blurry output.
File formats, colors, and placement notes
Send your master logo in AI or EPS format, saved with outlined fonts so no typeface substitution occurs during file handling. If your brand uses specific Pantone or CMYK values, include those in your brief rather than relying on on-screen color references, which vary between monitors.
For placement, provide a rough diagram or written description of where each graphic should appear, noting which panels are highest-visibility so TMP can prioritize print quality on those surfaces.
Proofing checklist to avoid brand and print issues
Review your digital proof against your brand guidelines before signing off, not after. Confirm spelling on all text elements, verify logo proportions, and check that color values match your approved brand standards exactly. Approving a proof quickly without a thorough check is the most common source of reprints, which add both cost and time.
Next Steps
This inflatables faqs guide covers the questions that come up most often before clients place their first order, but every project has its own details that a general resource cannot fully address. Your specific event date, venue, branding requirements, and budget all shape what the right build looks like for your situation, and that’s where a direct conversation with TMP’s team adds real value.
TMP Inflatables has been designing and producing custom inflatables for marketing agencies, brand teams, and event organizers since 2004. Whether you need a towering product replica for a product launch, a branded archway for a race finish line, or a misting tent for an outdoor summer activation, the process starts the same way: a quote request with your key specs and event date.
Thanks for reading our post on Inflatables FAQs, as experts in the inflatables industry since 2004 and working with brands directly as well as creative agencies, advertising agencies and experiential marketing agencies we have a proven track record.
When you’re ready to move forward, request a custom inflatable quote and TMP’s team will follow up with pricing and timeline details specific to your project.
Looking for more inspiration we love using Pinterest for creativity…check it out for more inspo
