

A 10×10 booth gives you roughly 100 square feet to make a first impression, and the display you choose determines whether attendees stop or keep walking. Finding the right portable trade show booth displays means balancing visual impact, setup speed, and transport logistics, all without blowing your event marketing budget before the show even starts.
The challenge is that hundreds of options exist, from basic pop-up backdrops to complete booth kits with counters, lighting, and branded walls. Some look sharp in product photos but require two people and an hour to assemble. Others pack down small but fall flat on a crowded expo floor where every booth is competing for the same eyeballs. Picking the wrong one costs you more than money, it costs you leads and brand visibility at the one place where both are concentrated.
This guide covers seven of the best portable displays built for standard 10×10 booth spaces. We’ve included a range of styles, from tension fabric backdrops to custom inflatable structures like the ones we design and manufacture here at TMP Inflatables, so whether you’re exhibiting for the first time or upgrading your current setup, you’ll find a display that fits your goals and your car trunk.
1. TMP Inflatables custom inflatable trade show displays
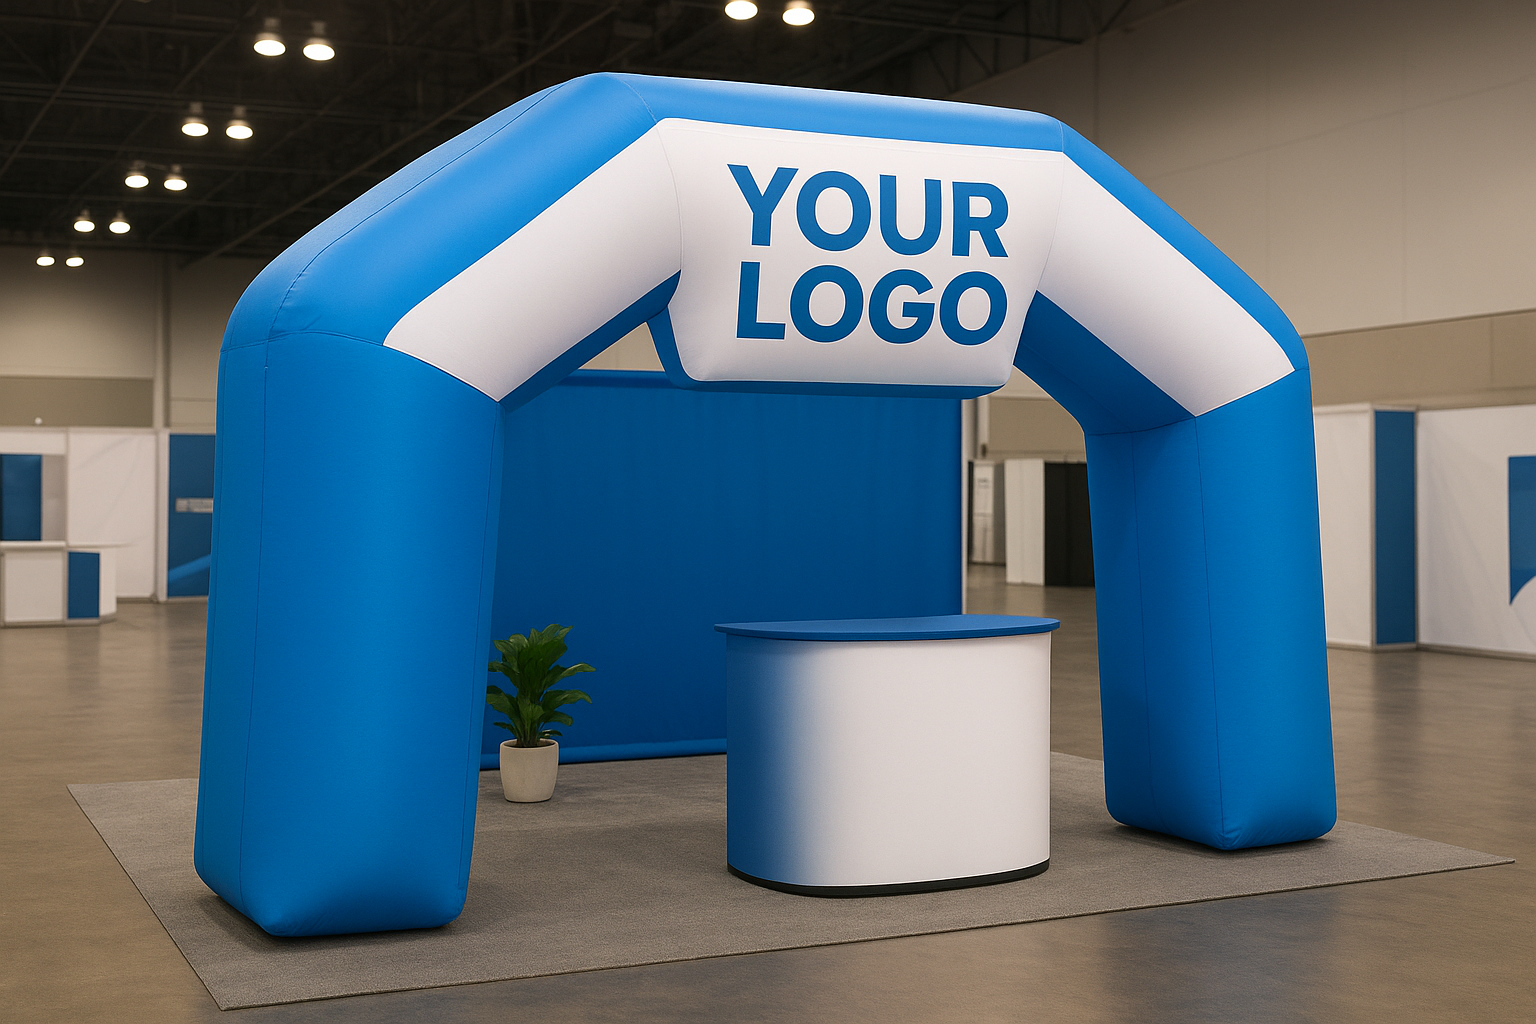
Custom inflatable displays from TMP Inflatables give you a fully branded, three-dimensional structure that stands out from every flat backdrop on the floor. These are not off-the-shelf products. Every piece gets built to your logo, colors, and dimensions, so your booth looks like a destination rather than a table with a banner.
What you get in a 10×10-friendly inflatable setup
A typical 10×10-compatible inflatable setup includes a custom-shaped inflatable structure, such as a branded arch, product replica, or character figure, designed to fit within or just above your booth footprint. TMP Inflatables handles the full design-to-production process in-house, which means the final product matches your brand files accurately without requiring a separate design vendor.
Why inflatables pull attention in crowded aisles
Height and shape are your two biggest advantages on a trade show floor. An inflatable rises above the sightline of flat displays and creates a visual anchor that draws attendees from across the hall. When every neighboring booth uses a fabric backwall, a three-dimensional branded inflatable is the object that registers first in a visitor’s peripheral vision.
An inflatable structure gives your booth a physical presence that no printed graphic can replicate.
How fast you can set it up and take it down
Most inflatable structures deploy in under 10 minutes using the included electric blower. One person can handle setup without tools or a ladder. Breakdown follows the same process in reverse: switch off the blower, fold the deflated unit into its carry bag, and load it into your vehicle.
How to power it, anchor it, and keep it safe indoors
You need a standard 110V outlet to run the blower continuously during the show. Anchor points built into the base let you secure the structure to the booth flooring or frame using sandbags or tie-downs, which most venues require for any overhead inflatable.
What it typically costs and what drives price
Custom inflatables generally start around $500 to $800 for smaller figures and climb based on size, complexity, and print coverage. Rush production and specialty materials add to the final price.
Trade-offs to know before you buy
Inflatables require a continuous power source, which adds one logistics step compared to other portable trade show booth displays. Some venues also require advance approval for inflatable structures, so confirm the show rules before you order.
2. Zip-up tension fabric backdrop kit
A zip-up tension fabric backdrop uses a lightweight aluminum tube frame that snaps or twist-locks together, then you zip a dye-sublimation printed fabric graphic over it like a pillowcase. The result is a tight, wrinkle-resistant surface that keeps your branding flat and sharp throughout the show day. These kits rank among the most popular portable trade show booth displays available for standard 10×10 spaces.
What it is and how the zip-up graphic works
The fabric graphic wraps the frame and zips closed along the bottom or side, pulling the material taut without clips or velcro. Because printing uses dye-sublimation, colors stay vivid under both natural and artificial lighting.
Why it looks clean in a 10×10
Zip-up backdrops create a seamless single-image display across the full wall, eliminating the panel gaps common on older frame systems. That continuous surface lets your brand design read clearly from across the aisle.
A wrinkle-free graphic surface signals professionalism before a single attendee reaches your booth.
What to pair it with for a complete booth
Add a counter or podium in front for product demos and a pair of LED spotlights mounted to the frame to improve visibility in dim convention halls.
Setup, breakdown, and transport basics
Most zip-up kits pack into a rolling wheeled bag that fits in a standard car trunk or checked luggage. Full setup takes 15 to 25 minutes for one person.
Typical price range for 8 ft to 10 ft kits
Complete kits run $300 to $700, with replacement graphics priced between $150 and $300 depending on size and complexity.
Common fit and print mistakes to avoid
Always order your graphic using the manufacturer’s exact template file to avoid sizing issues at the show. Also supply artwork at 300 DPI or higher to prevent blurry output on the final print.
3. Pop-up fabric backwall display
Pop-up fabric backwall displays use a collapsible spring-loaded frame that expands when you release it from its carry bag, then holds a printed fabric graphic flat across the surface. These rank among the most reliable portable trade show booth displays for exhibitors who need repeatable results without a steep learning curve.
How pop-up frames work now vs older panel systems
Modern pop-up frames use flexible fiberglass or aluminum rods rather than the rigid interlocking panel grids from older systems. The frame unfolds in seconds with no loose components to track between shows.
When a pop-up backwall beats a tube frame
Choose a pop-up when you exhibit frequently and need a setup process that works the same way every time. Tube-frame kits offer more shape variety, but pop-ups win on speed and consistency.
A pop-up backwall is the closest thing to a no-surprise display for exhibitors who travel and set up alone.
What size and shape works best in a 10×10
A standard 8-foot or 10-foot wide straight or curved pop-up fits a 10×10 footprint without crowding your demo space. Curved frames add depth and visual interest that flat versions cannot match.
Setup time, tools, and staffing needs
One person can complete the full setup in 10 to 15 minutes with no tools required. The fabric graphic attaches using hook-and-loop fasteners or integrated magnetic buttons depending on the kit.
Typical price range and upgrade options
Complete kits run $400 to $900 based on size and print quality. Adding LED lighting rails to the frame top runs an additional $50 to $150.
What can go wrong on-site and how to prevent it
The most common failure is a bent or snapped rod, which collapses part of the frame mid-show. Pack a spare rod set in your kit and practice swapping it before your first show date.
4. Portable backlit lightbox wall
A portable backlit lightbox wall places LED panels behind a translucent SEG (silicone edge graphic) fabric to illuminate your branding evenly from behind, producing a glowing display that reads clearly across a crowded convention floor. These systems rank among the most visually striking portable trade show booth displays available for standard 10×10 booths.
What makes a lightbox portable
Portable lightbox frames break down into flat-packed aluminum sections that slide into a slim rolling case. Most LED modules clip directly onto the frame, which means you avoid managing loose wiring during setup or breakdown.
When backlighting pays off in a 10×10
Backlighting works best when your graphics rely on photography or bold color fields that benefit from consistent, even illumination. A backlit wall holds its visual strength in dim hall corners where standard printed graphics fade into the background.
Backlighting turns your booth wall into its own light source, which means your branding stays vivid no matter where the venue places you on the floor.
What to check for brightness, power, and heat
Look for units rated at at least 3,000 lumens and confirm the system draws under 150 watts to avoid tripping venue circuit breakers. Run the unit for 30 minutes before your first show to verify the frame stays cool during extended operation.
Setup and packing considerations for travel
Most kits assemble in 20 to 30 minutes and pack into a rolling case that qualifies as checked airline luggage. Bring a spare LED strip, since on-site replacements are nearly impossible to source on show day.
Typical price range and ongoing graphic costs
Complete kits run $600 to $1,500 for a full 10-foot wide system. Replacement SEG graphics cost $200 to $400 per panel depending on image complexity and print size.
Practical downsides to plan around
Lightboxes require a dedicated power outlet for continuous LED operation, which adds a line to your venue electrical order and increases pre-show logistics. The fabric surface also shows fingerprints and smudges more visibly than standard print graphics, so pack a lint roller for each show day.
5. Modular portable display kit with add-ons
A modular portable display kit bundles multiple compatible components into one coordinated system, giving you a backwall, counter, shelving, and sometimes lighting in a single purchasable package. These kits rank among the most flexible portable trade show booth displays for exhibitors who adjust their setup between shows.
What "modular" means in a 10×10 footprint
Modular means each component connects and disconnects independently from the same frame ecosystem. In a 10×10 space, this lets you run a full backwall plus a counter at one show and strip it back to just the backdrop for a smaller venue without buying a second display.
Add-ons that actually improve lead capture
Focus add-ons on demo surfaces and product holders rather than decorative extras. A branded counter with built-in storage keeps the table clear for conversation and lets staff access materials without turning away from visitors.
The right add-ons create a working booth, not just a display.
How to design the layout for flow and storage
Place your backwall directly against the rear booth boundary and position any counter closer to the aisle to invite visitors in. Keep cases and boxes behind the counter so your visible space stays clean throughout the day.
Setup complexity and what parts to label
Label every frame section and connector with masking tape before your first show. Modular kits ship with more components than simple pop-ups, and unlabeled parts slow you down significantly during show-floor setup.
Typical price range and when it beats renting
Complete kits run $800 to $2,000 depending on component count and print coverage. Buying beats renting after two or three shows at most venues.
Mistakes that make modular booths feel cluttered
Avoid filling every shelf or counter surface with product samples and marketing materials at once. Choose one focal point per visible surface and leave the rest open so visitors can focus where you want them to.
6. Retractable banner stand booth kit
A retractable banner stand booth kit bundles two to four individual banner stands into a coordinated set that, when arranged together, functions as a complete display. These rank among the most budget-friendly portable trade show booth displays available for exhibitors working with tight logistics or limited setup time.
What counts as a banner-stand "booth"
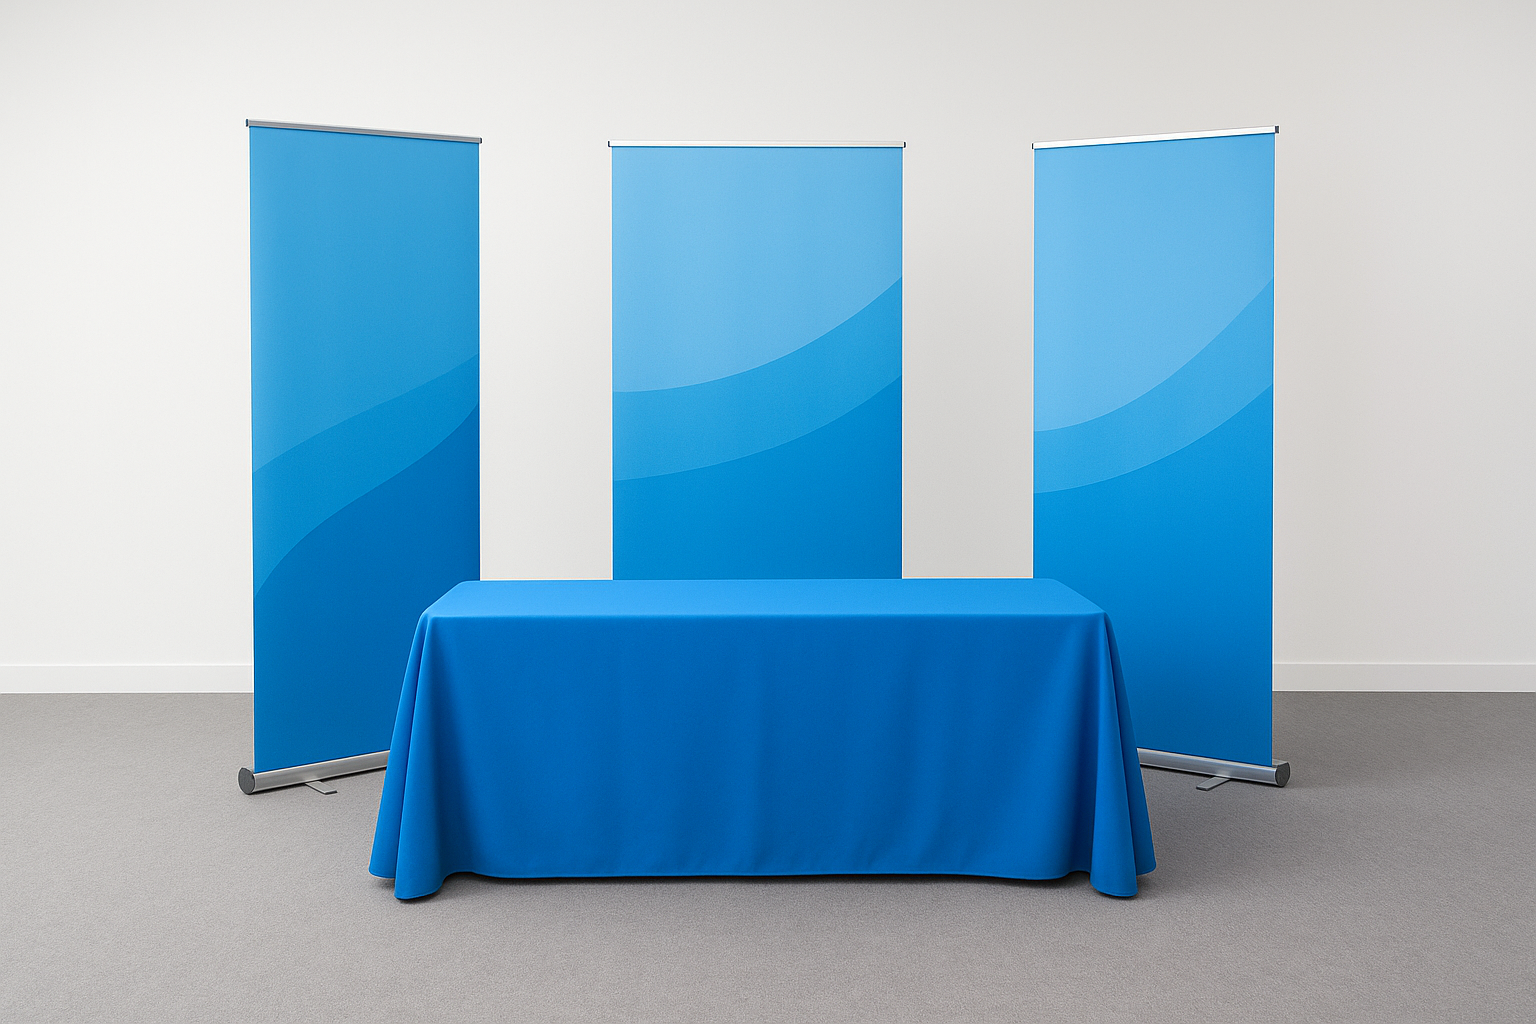
A banner-stand "booth" means three or more stands positioned to define your booth space visually. A matched graphic set printed across multiple banners creates the impression of a unified display rather than a collection of separate pieces.
How to make banner stands look cohesive
Order all graphics from the same print run using identical color profiles. A panoramic image split across three banners reads as one continuous backdrop when the stands align correctly at the same height.
Consistent printing across every banner panel is what separates a professional booth from a collection of random signage.
Best layout for a 10×10 and a 6 ft table
Place two or three banner stands across the back wall and set your table in front with one stand on each side. This creates a natural entry point and branded perimeter without overcrowding the space.
Setup speed and transport realities
Each stand deploys in under two minutes by extending the telescoping pole and locking the graphic in place. A full kit fits into two slim carry bags that load easily into most vehicle trunks.
Typical price range for a full kit
A complete three-to-four-stand kit runs $200 to $500 including printed graphics. Single premium retractable stands with heavy-duty hardware can reach $100 to $200 each before printing costs.
Limits to expect with durability and visibility
Banner stands tip over easily in high-traffic areas and offer less visual height than full backwall systems. Plan for weighted bases if your venue has heavy foot traffic near the aisle edge.
7. Tabletop display kit plus branded table setup
A tabletop display kit centers your booth around a 6-foot table and a compact display rather than a full-height backwall system. This approach works well for exhibitors who need functional portable trade show booth displays without the bulk or setup complexity of larger rigs.
When a tabletop kit works for a 10×10
A tabletop setup fits a 10×10 booth when your product or service sells through conversation rather than visual spectacle. If attendees need to handle samples or review materials up close, a table-forward layout keeps everything within arm’s reach without wasting floor space.
What to include so it feels like a real booth
Include a branded table cover, a tabletop retractable banner or compact display frame, and a small product riser to add height variation. These three elements together create a cohesive brand presence without requiring large-format graphics or heavy hardware.
How to build height and visibility without heavy gear
A tabletop tension fabric display standing 24 to 36 inches tall adds visual height above the table surface. Pairing this with LED task lighting keeps your materials visible in poorly lit corners of the venue.
Height matters even at table level, so raise your key visuals above the product line.
Setup and packing for one-person teams
Most tabletop kits fit in a single bag or rolling case that you carry in one trip. Full setup takes under 10 minutes with no tools required.
Typical price range and where to spend first
Complete kits run $150 to $400. Spend first on a quality printed table cover since it covers the most visible surface in your entire booth.
Mistakes that make tabletop booths look cheap
Avoid mismatched colors across your table cover, banner, and handouts. Inconsistent branding across surfaces signals a lack of preparation to attendees before they reach your table.
Picking the right booth for your next show
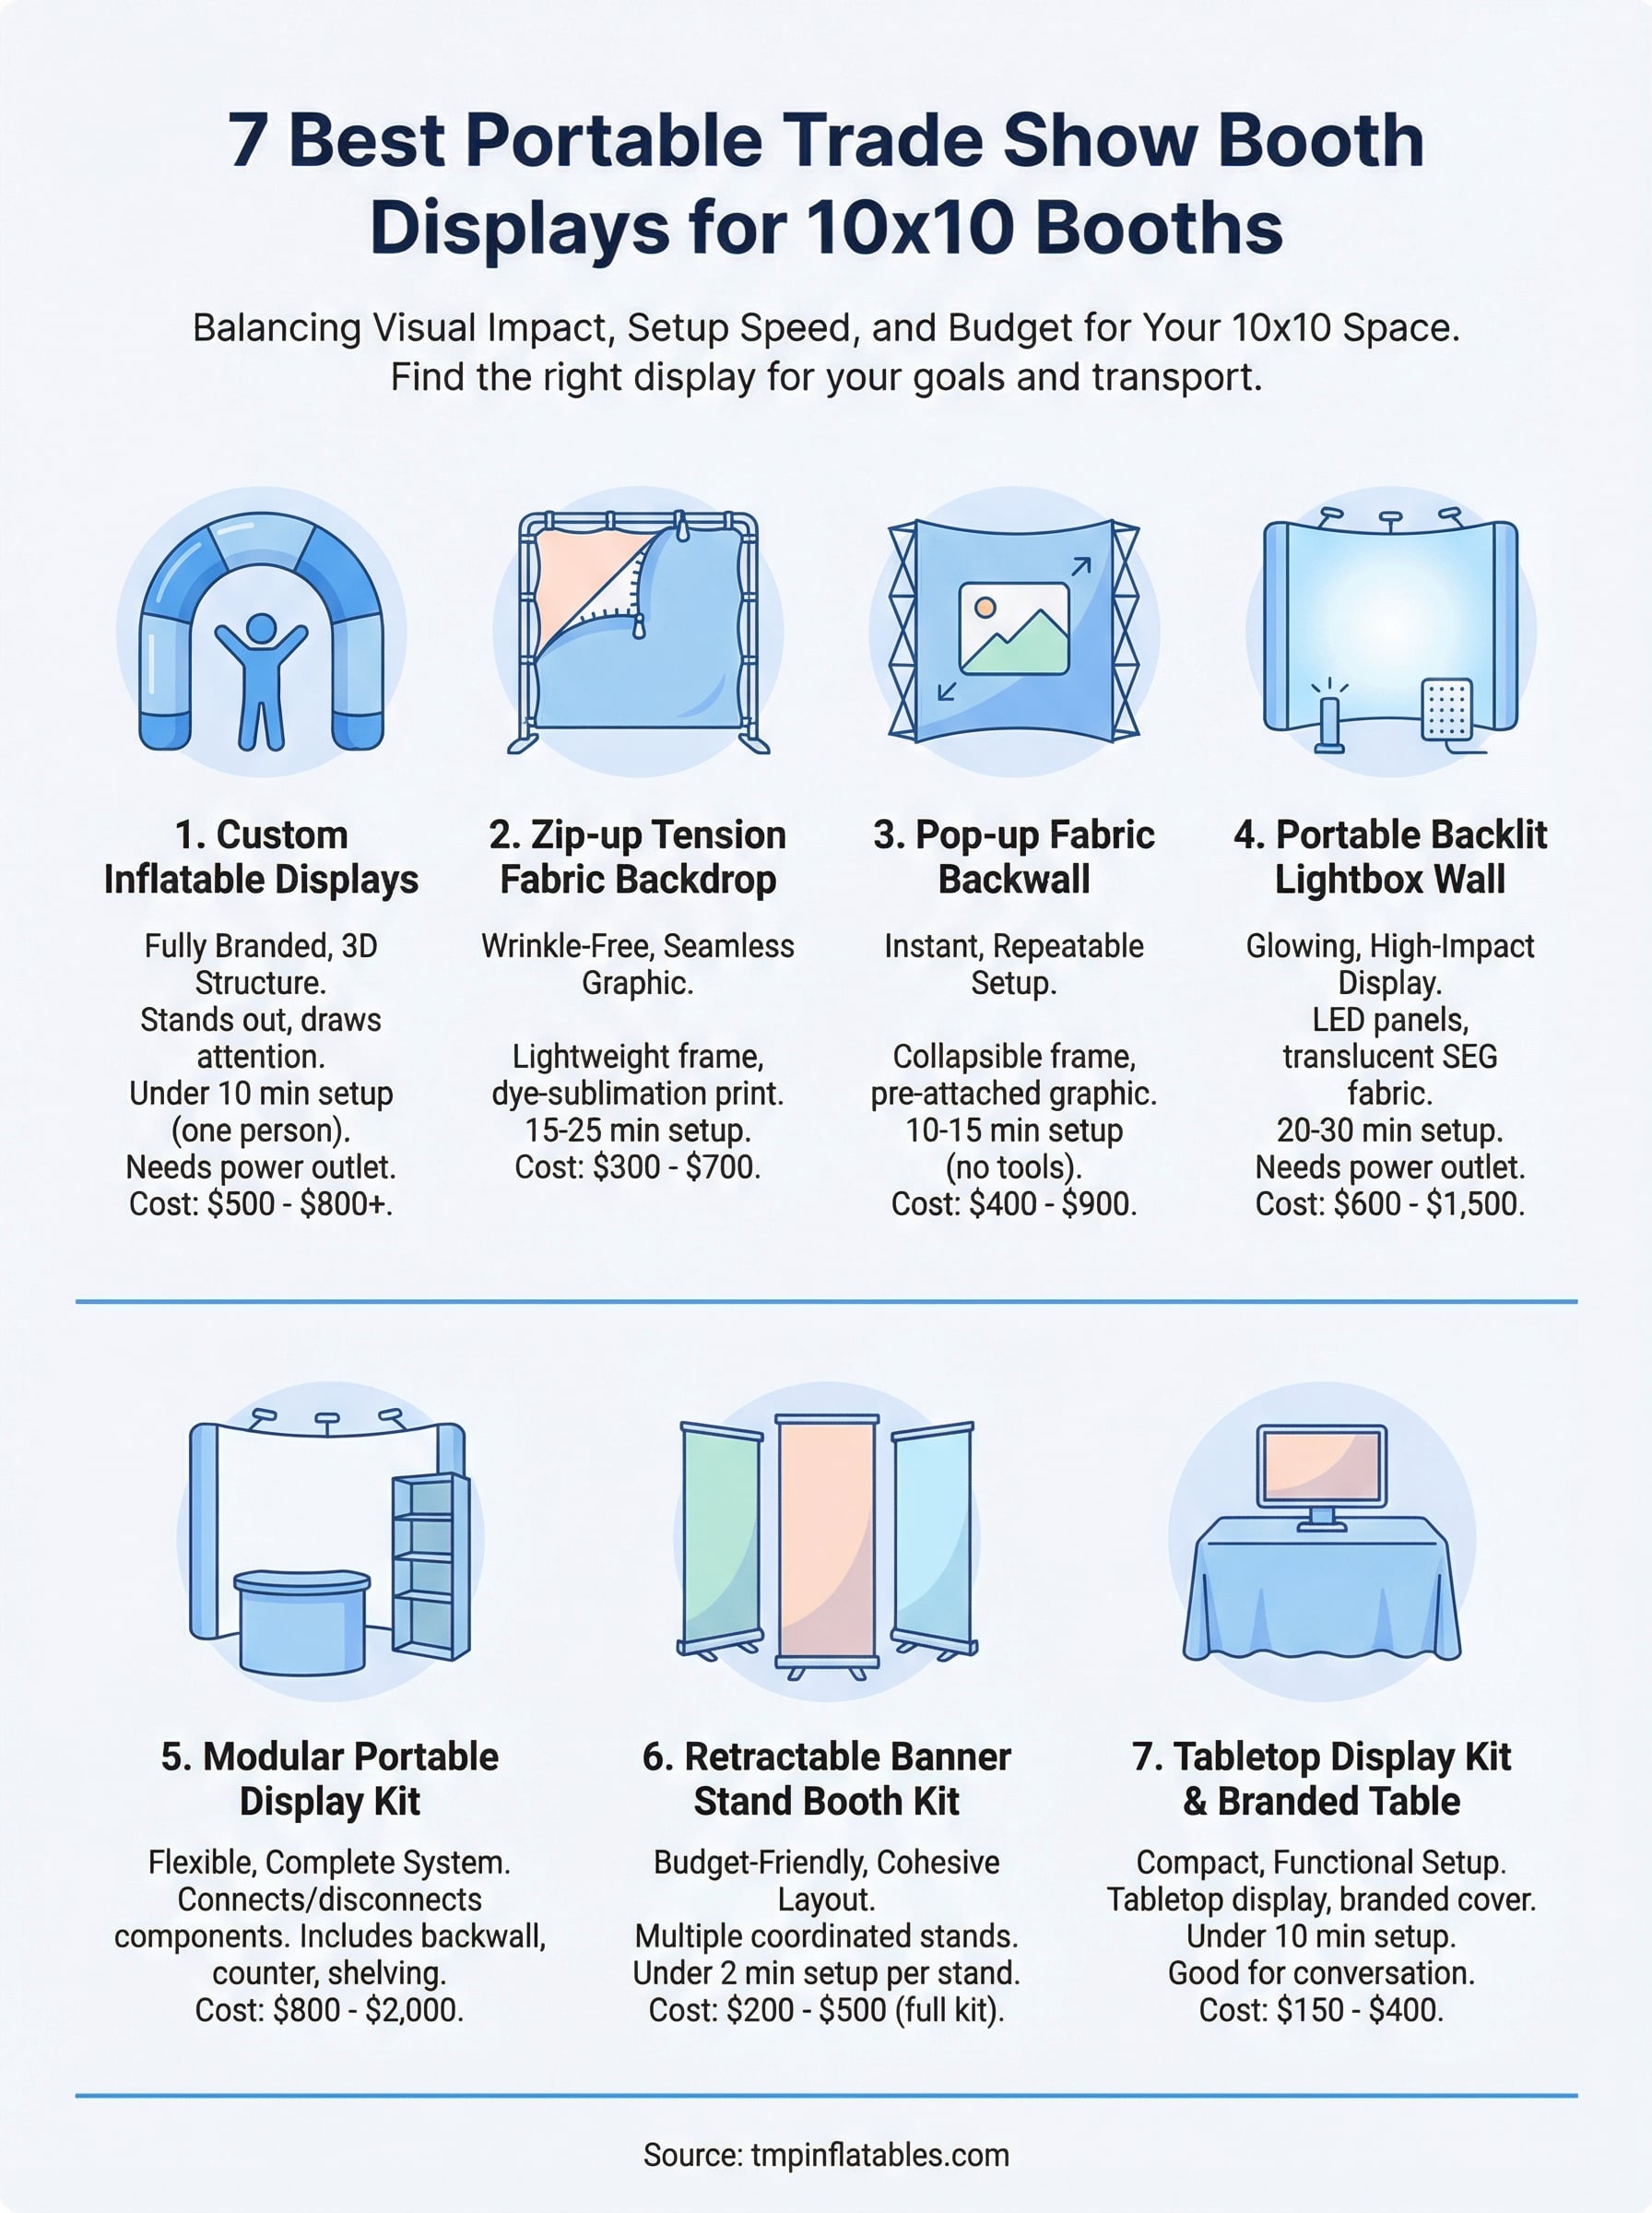
Your budget, travel situation, and show goals should drive every display decision. If you need raw visual pull on a crowded floor, a custom inflatable structure or a backlit lightbox wall gives you the presence to draw traffic from across the hall. If you prioritize fast solo setup and minimal gear, a pop-up fabric backwall or a matched retractable banner kit gets you show-ready in under 20 minutes without extra help.
Most exhibitors narrow the field by answering two questions: how much space you have in your vehicle, and how much setup time the venue allows. From there, the best portable trade show booth displays come down to matching your format to your show type and staffing reality. If a custom inflatable display built to your exact brand specs fits your strategy, request a quote from TMP Inflatables and we will walk you through options, sizing, and timelines.
